How to Install Acoustic Ceiling Clouds
PLEASE NOTE: Hanging cable and ceiling mounts are not included, however, we do offer a Gripple Express Hanger and Cable Pack.
Installation not as easy as you thought it'd be? Feel free to give us a call at 1.866.505.MUTE or chat with one of our Acoustic Specialists. We would be happy to assist you with your installation!


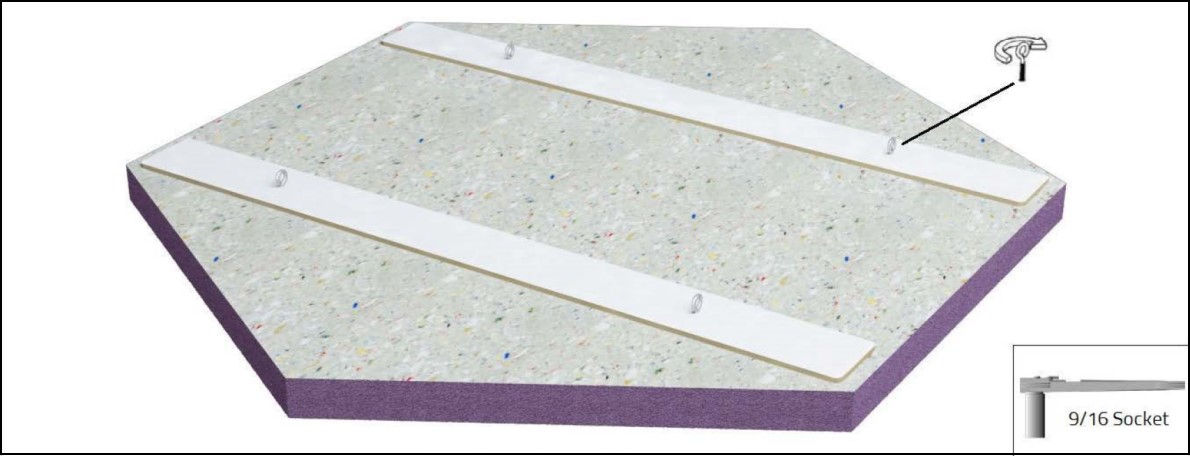
Acoustic Ceiling Clouds (3'x3' and Smaller):
Instructions:
To ensure proper installation, follow the instructions below and check building codes.
- Start screwing in the included Eye Hooks into the pre-drilled locations by hand, then use a 9/16" socket to finish screwing them in.
**IMPORTANT** Be sure not to over-tighten. - Hang the Cloud using hardware with load ratings twice that of the product's weight.
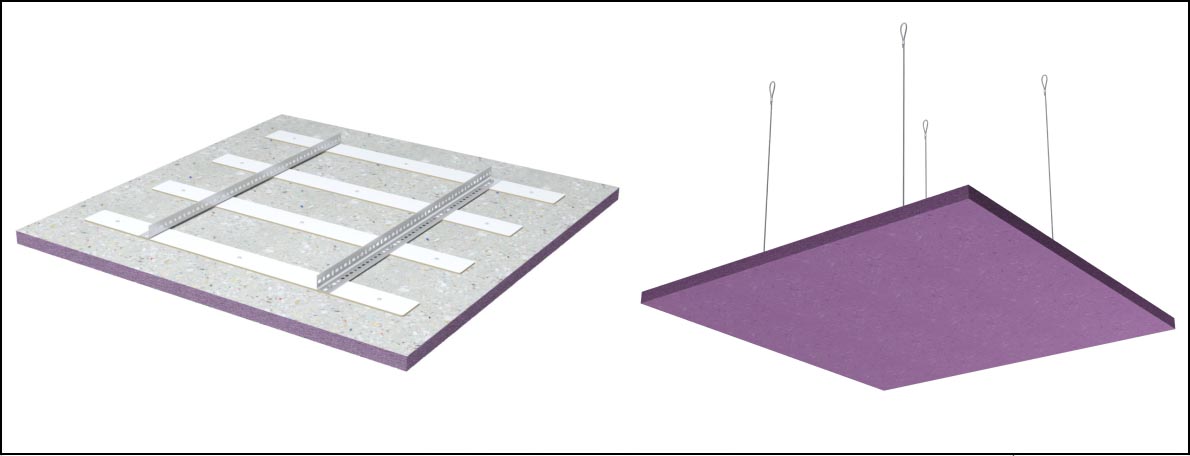
Acoustic Ceiling Clouds (3'x4' and Larger):
Tools Required:
- Power Drill w/ Adjustable Torque
- 3/8” Socket Drive
- 3/8” Socket
Included:
- 3/8” Drive Self-Tapping Screws
- Steel Perforated Angle
- Acoustic Cloud w/ Rigid Substrate
Instructions:
To ensure proper installation, follow the instructions below and check building codes.
- Chuck the 3/8” socket and drive into drill. Set torque setting to middle of torque range.
- Align and center Steel Perforated Angle with the locating notches in the structural backers.
- Insert self-tapping screws through the Steel Perforated Angle using the power drill.
**DO NOT** over-torque the screws; if over-torquing occurs, remove the screw and insert into a new location.
**IMPORTANT** Set the torque setting to the middle of the torque range. - Hang the Cloud using hardware with load ratings twice that of the Cloud's weight.