The United States of America is celebrating its 250th birthday in 2026, and we thought it'd be fun to commemorate America's semiquincentennial by identifying Audimute acoustic panels (all of which are made in the USA) that remind us of each U.S. state.
This week: Louisiana, home to beautiful wetlands, Jean Lafitte National Historical Park, and the mouth of the mighty Mississippi River.
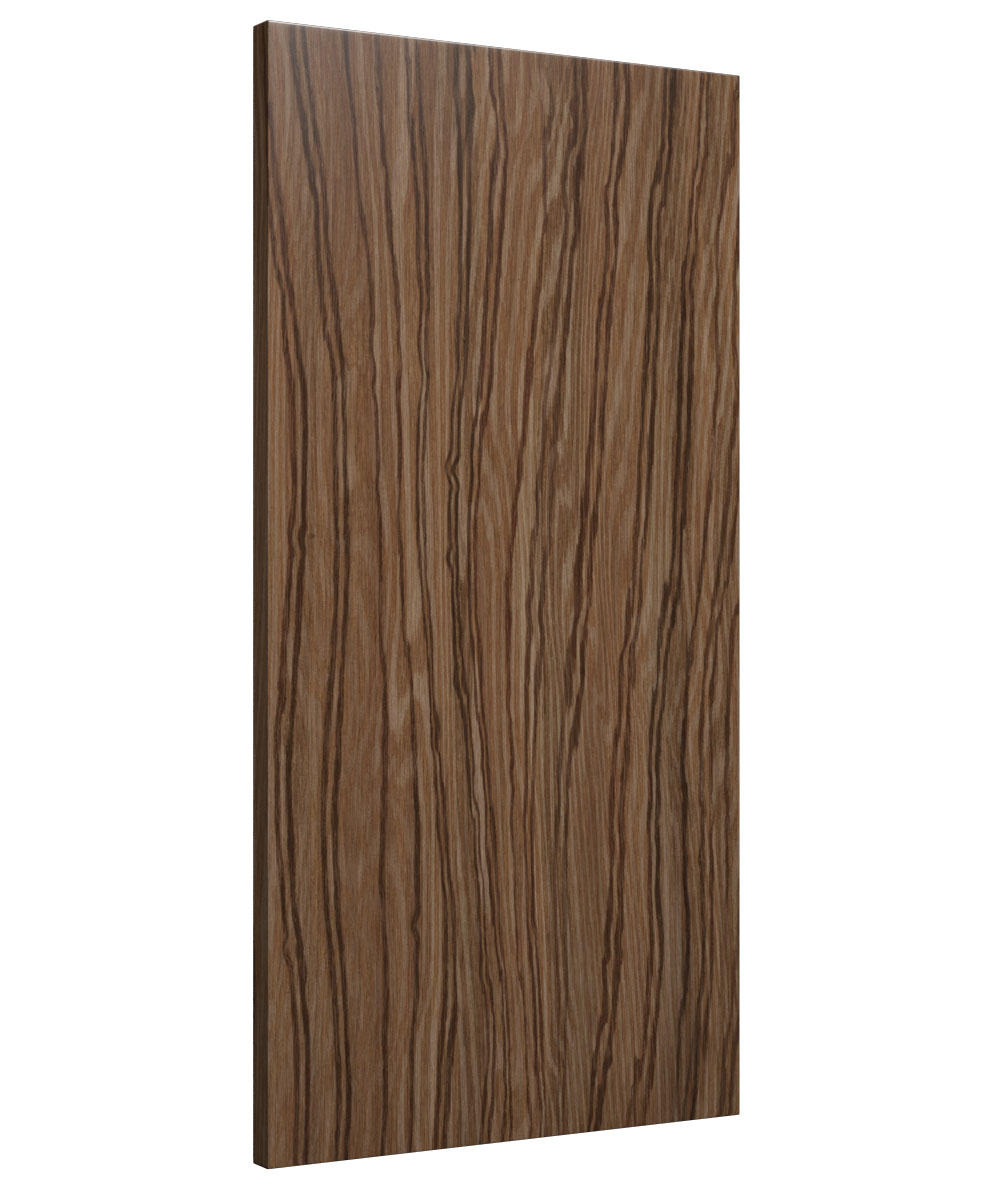
For Louisiana, we chose an Audimute acoustic panel that evokes the iconic bald cypress trees rising out from the state's swampy waters: the AcoustiWood® Exotic Acoustic Wood Alternative Panel in the "Zebra" style.
The bald cypress has long been an emblem of the Bayou State; in fact, Louisana designed it as the official state tree in 1963. And while the bald cypress is a popular building material for wooden doors, flooring, and cabinets, you won't find it in our AcoustiWood panels and planks; made from post-consumer cellulose and cotton, they absorb echoes, reverberations, and mid to high frequencies while maintaining the textured appearance of real wood.
Looking for a sound management solution for your home, business, church, or studio? Call us at 1.866.505.MUTE or fill out a Room Analysis Form to get a free consultation from our Acoustic Specialists!
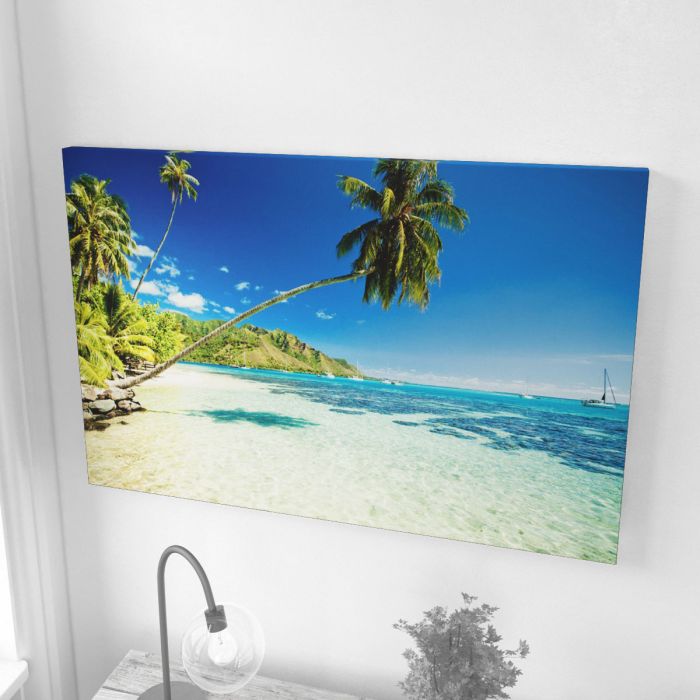
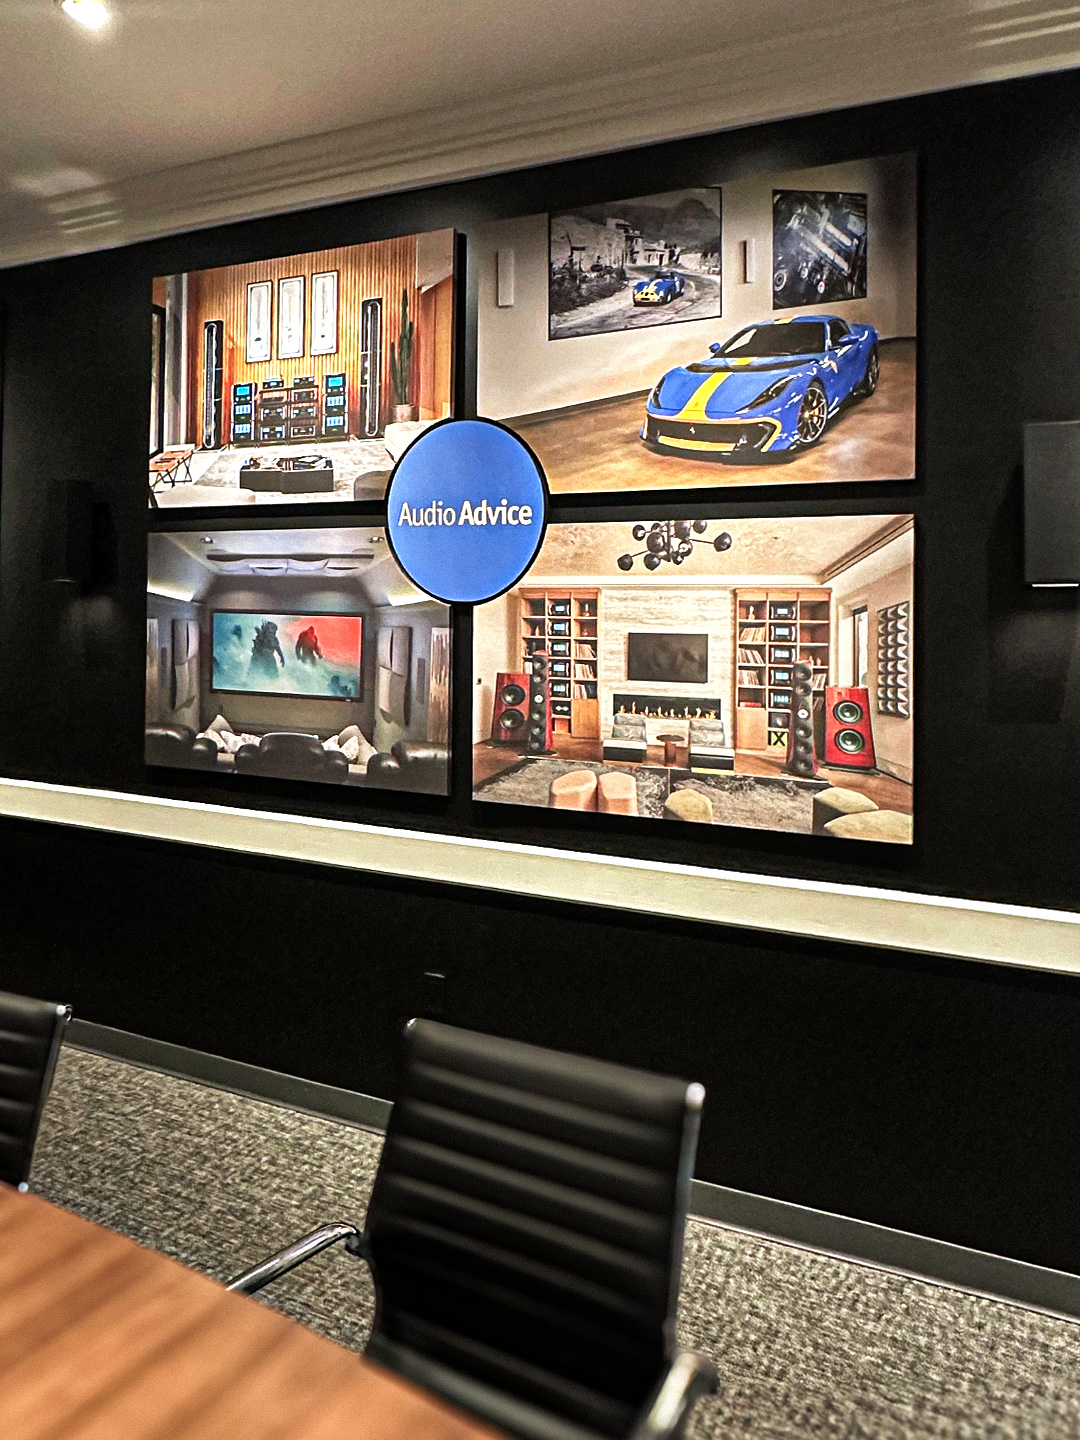
Audimute offers several types of acoustic panels to help reduce echoes and reverberations, but one of our most popular is the image acoustic panel, featuring photos, logos, or artwork. Here's why we love our image acoustic panels (and you will, too!):
1. Outstanding Sound Absorption
Each Audimute acoustic panel — image or otherwise — is made with our signature eco-C-tex® sound absorption material. Comprised of a blend of recycled cotton and cellulose fibers, eco-C-tex absorbs echoes, reverberations, and mid to high frequencies to improve sound quality within a room. Each Audimute image acoustic panel has an NRC rating of 0.95, meaning it absorbs an average of 95% of echoes and reverberations.
2. Eco-Friendly
Fiberglass and foam are common components in other companies' acoustic panels, but they aren't nearly as environmentally friendly as Audimute's eco-C-tex material. Fiberglass uses chemical binders and isn't biodegradable, while foam is made from petroleum-based plastics and can degrade over time. Additionally, making eco-C-tex uses only 1/10 of the energy required to produce fiberglass and 1/40 of the energy used to create foam.
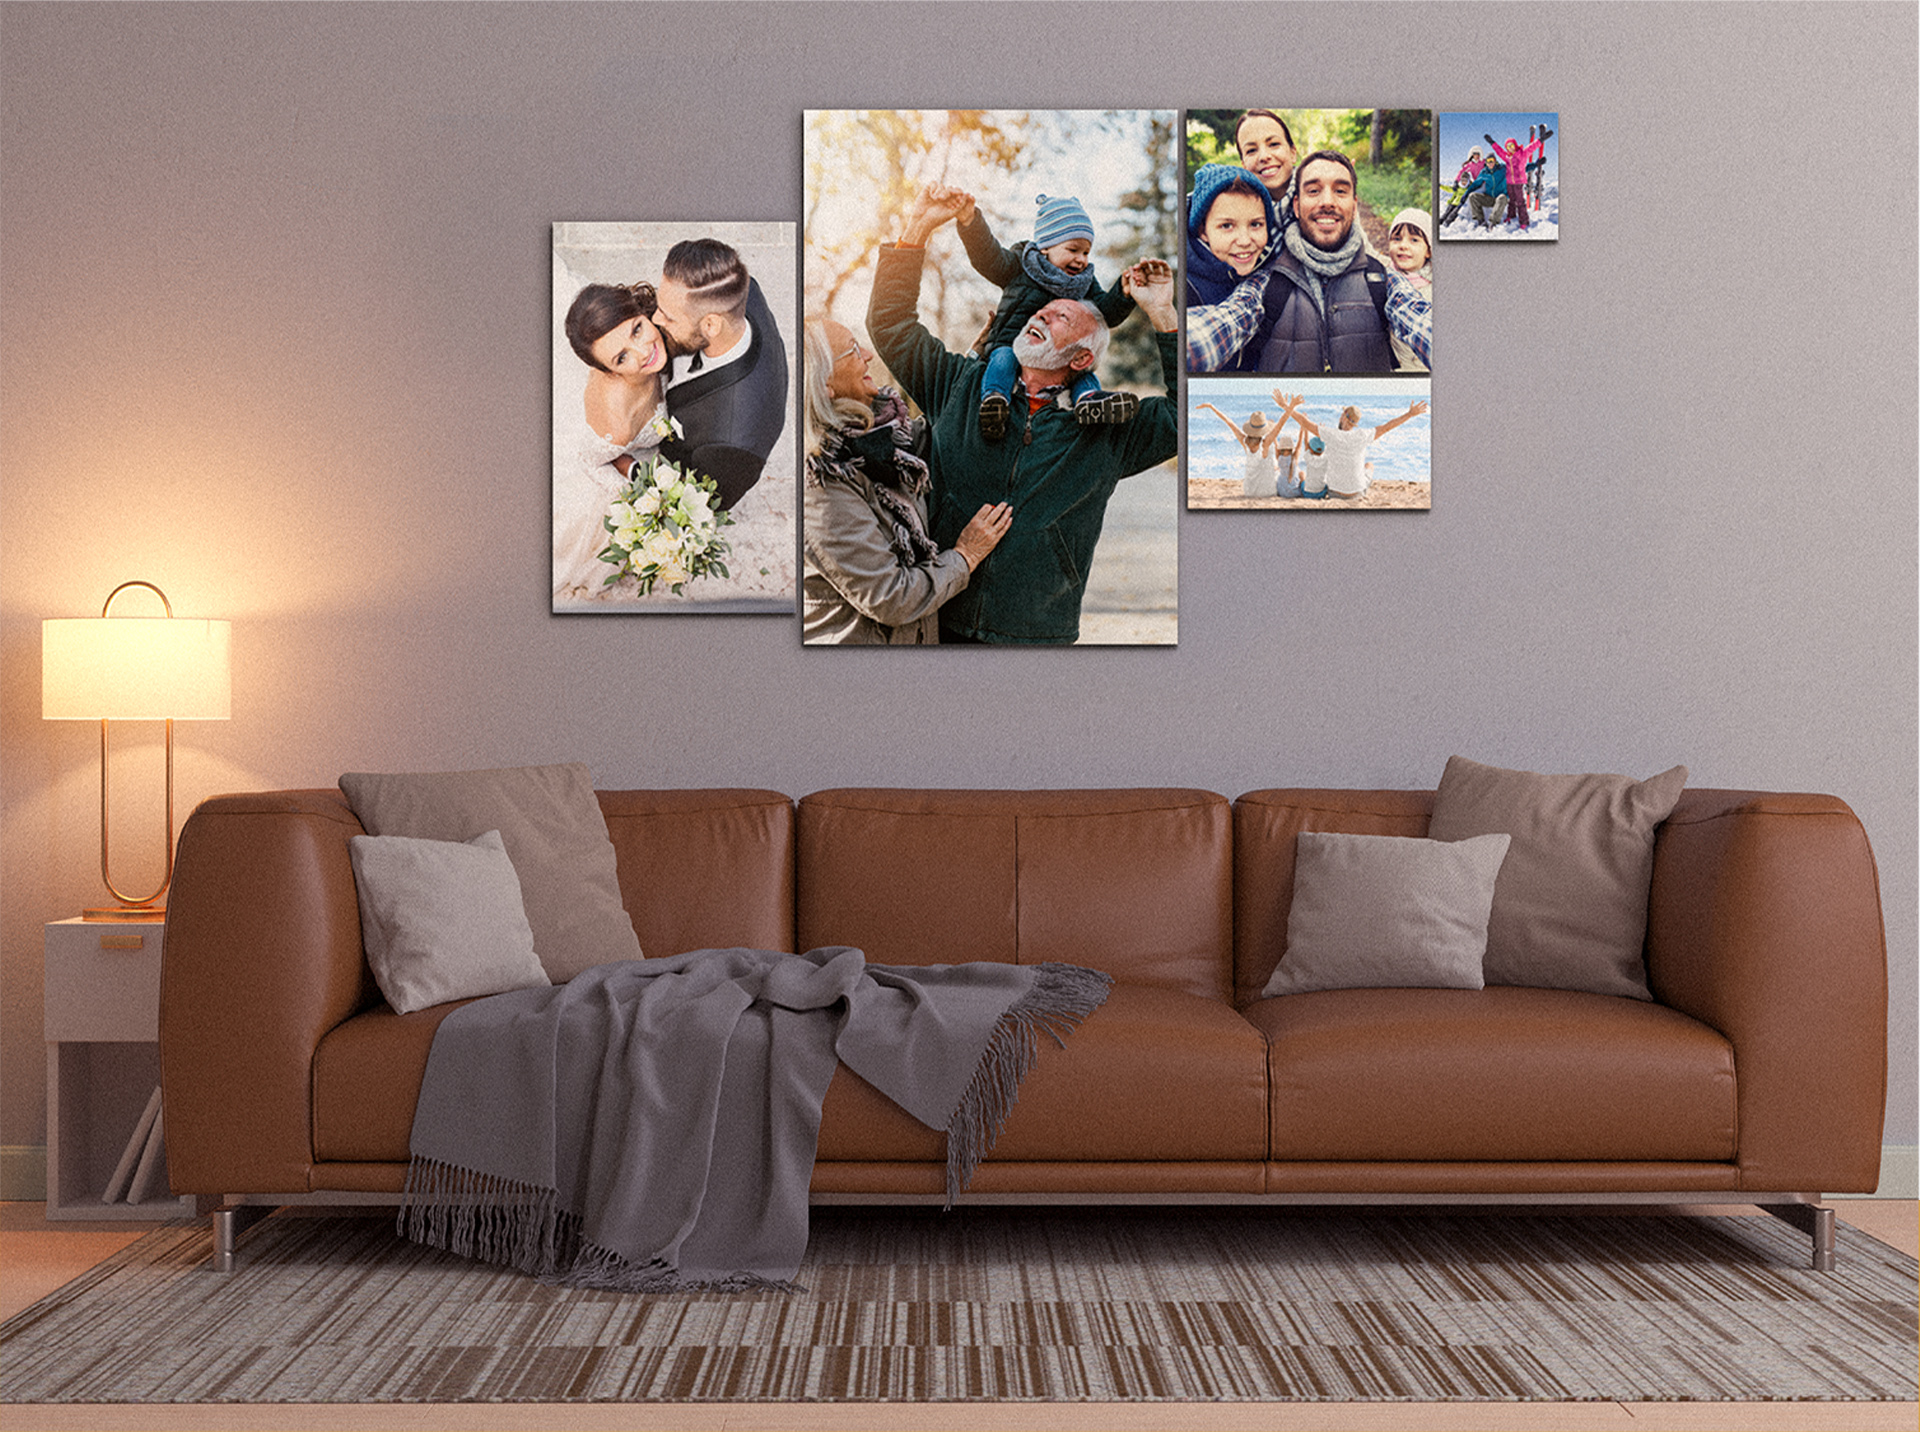
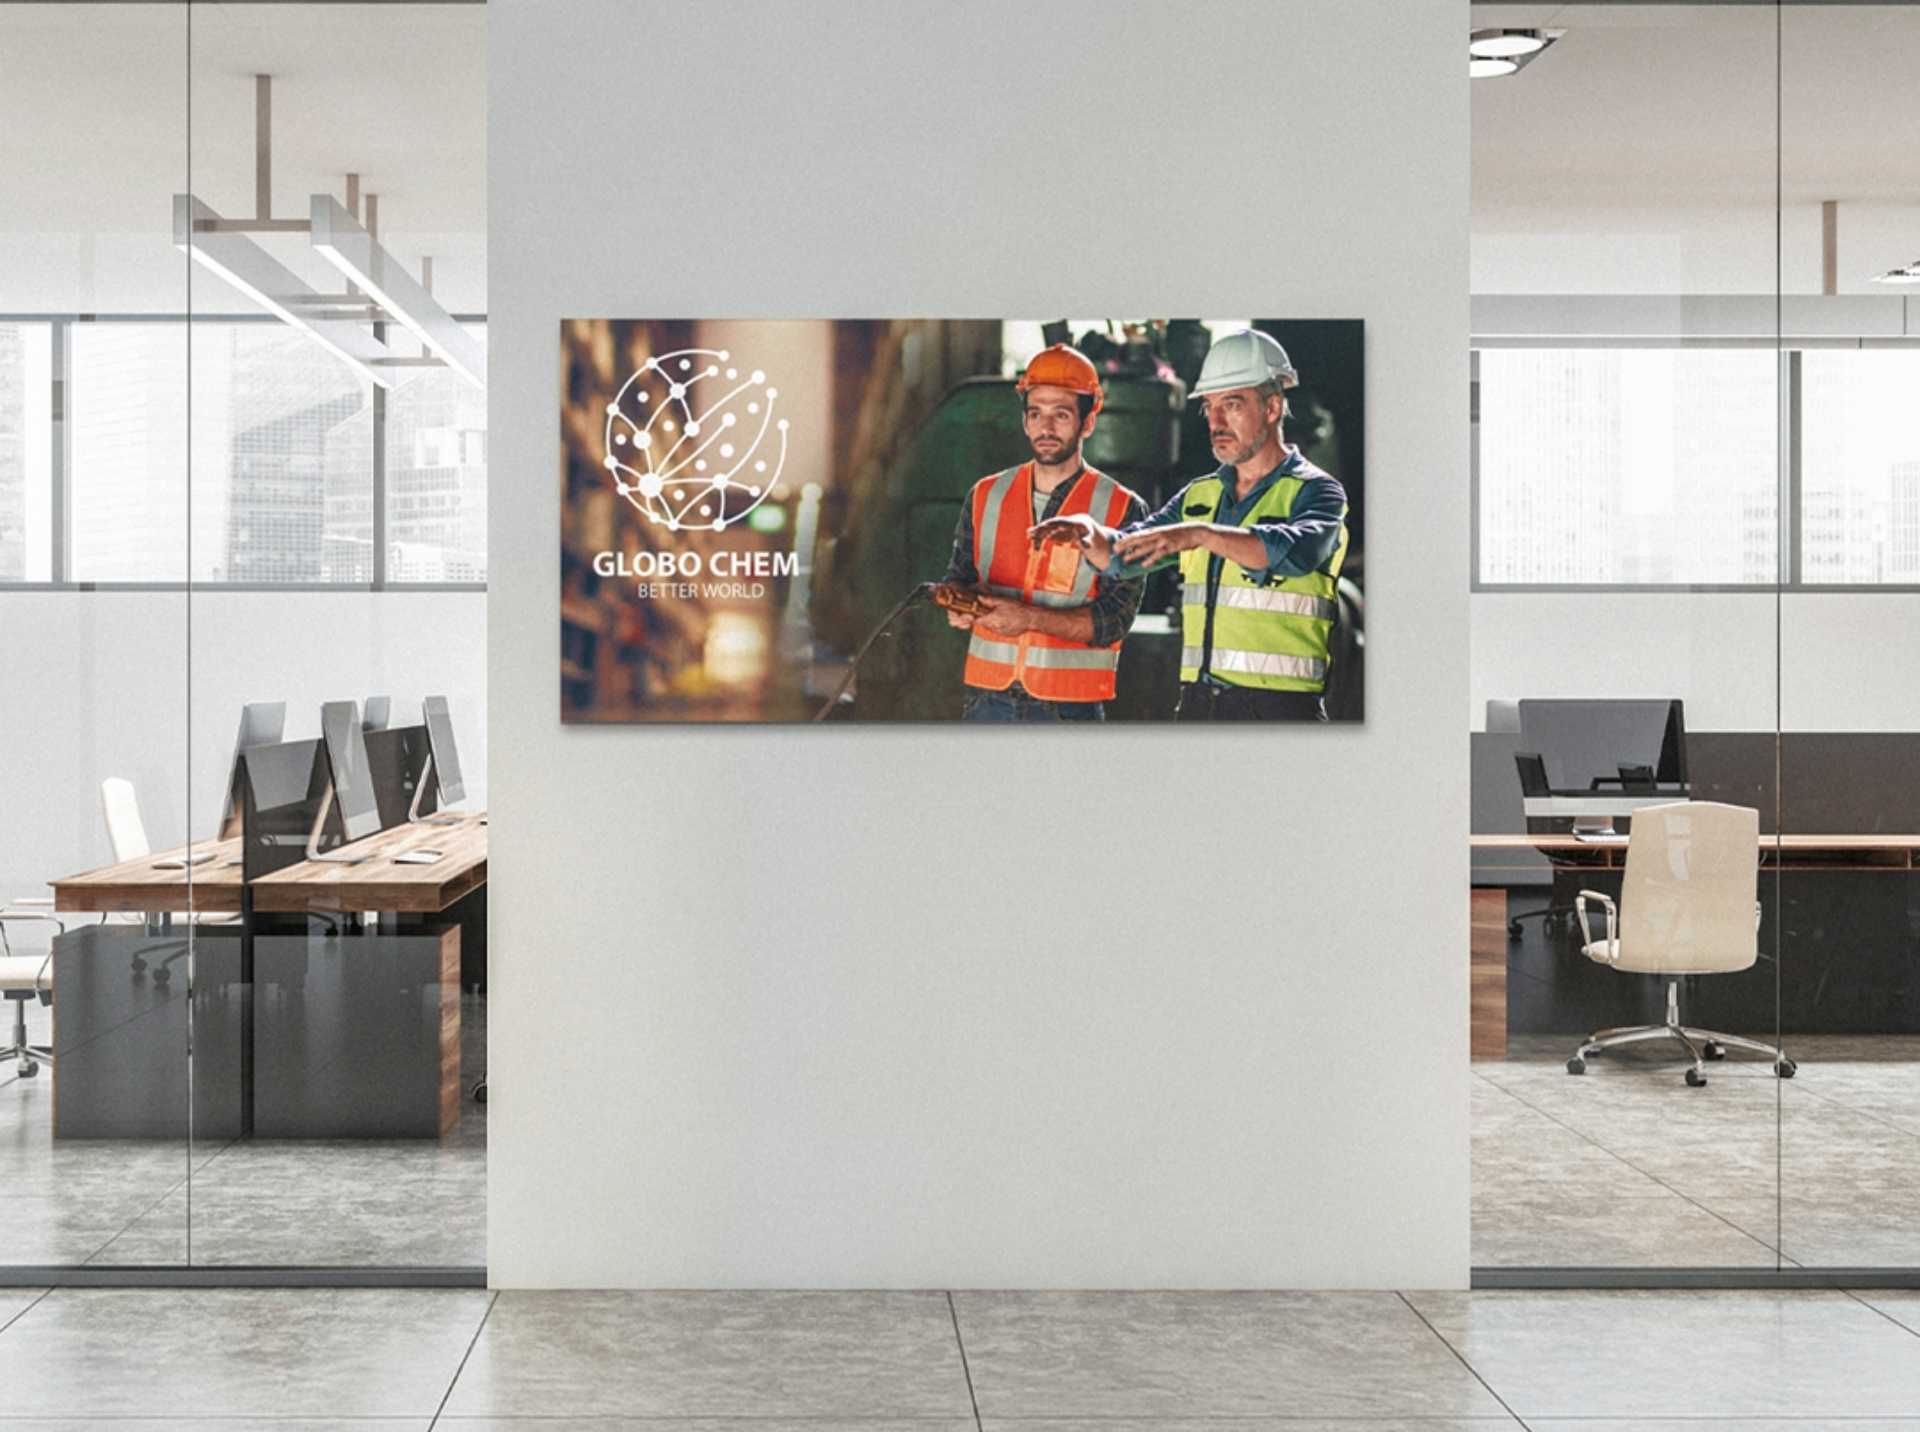
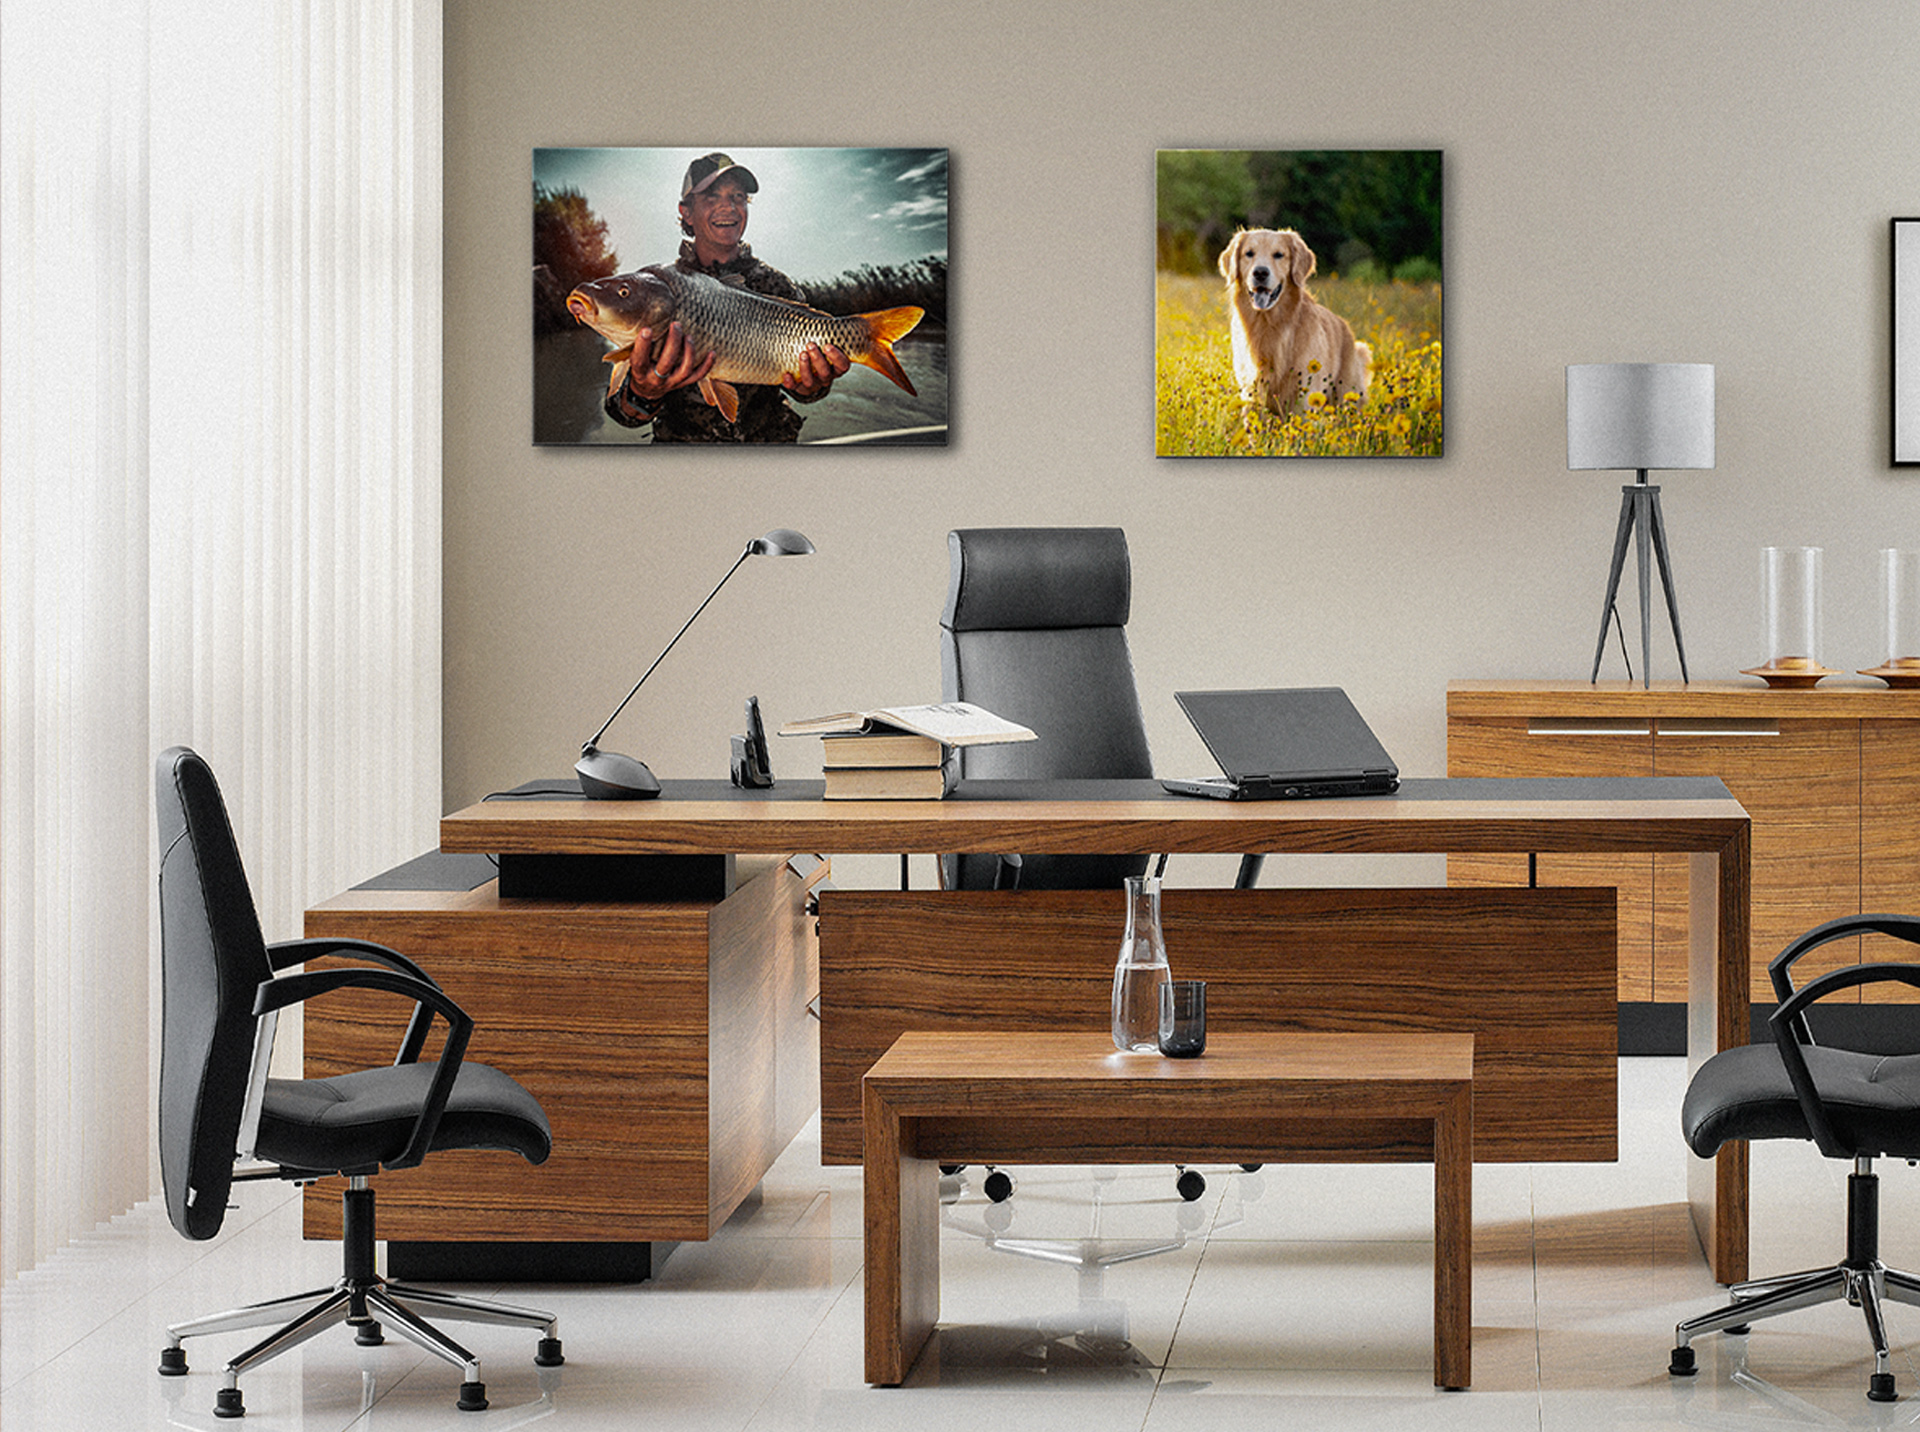
Audimute offers custom image panel options, too! Upload a favorite family photo, your company's logo, a portrait of a beloved pet, or any other non-copyrighted image for a personalized sound solution that's all yours.
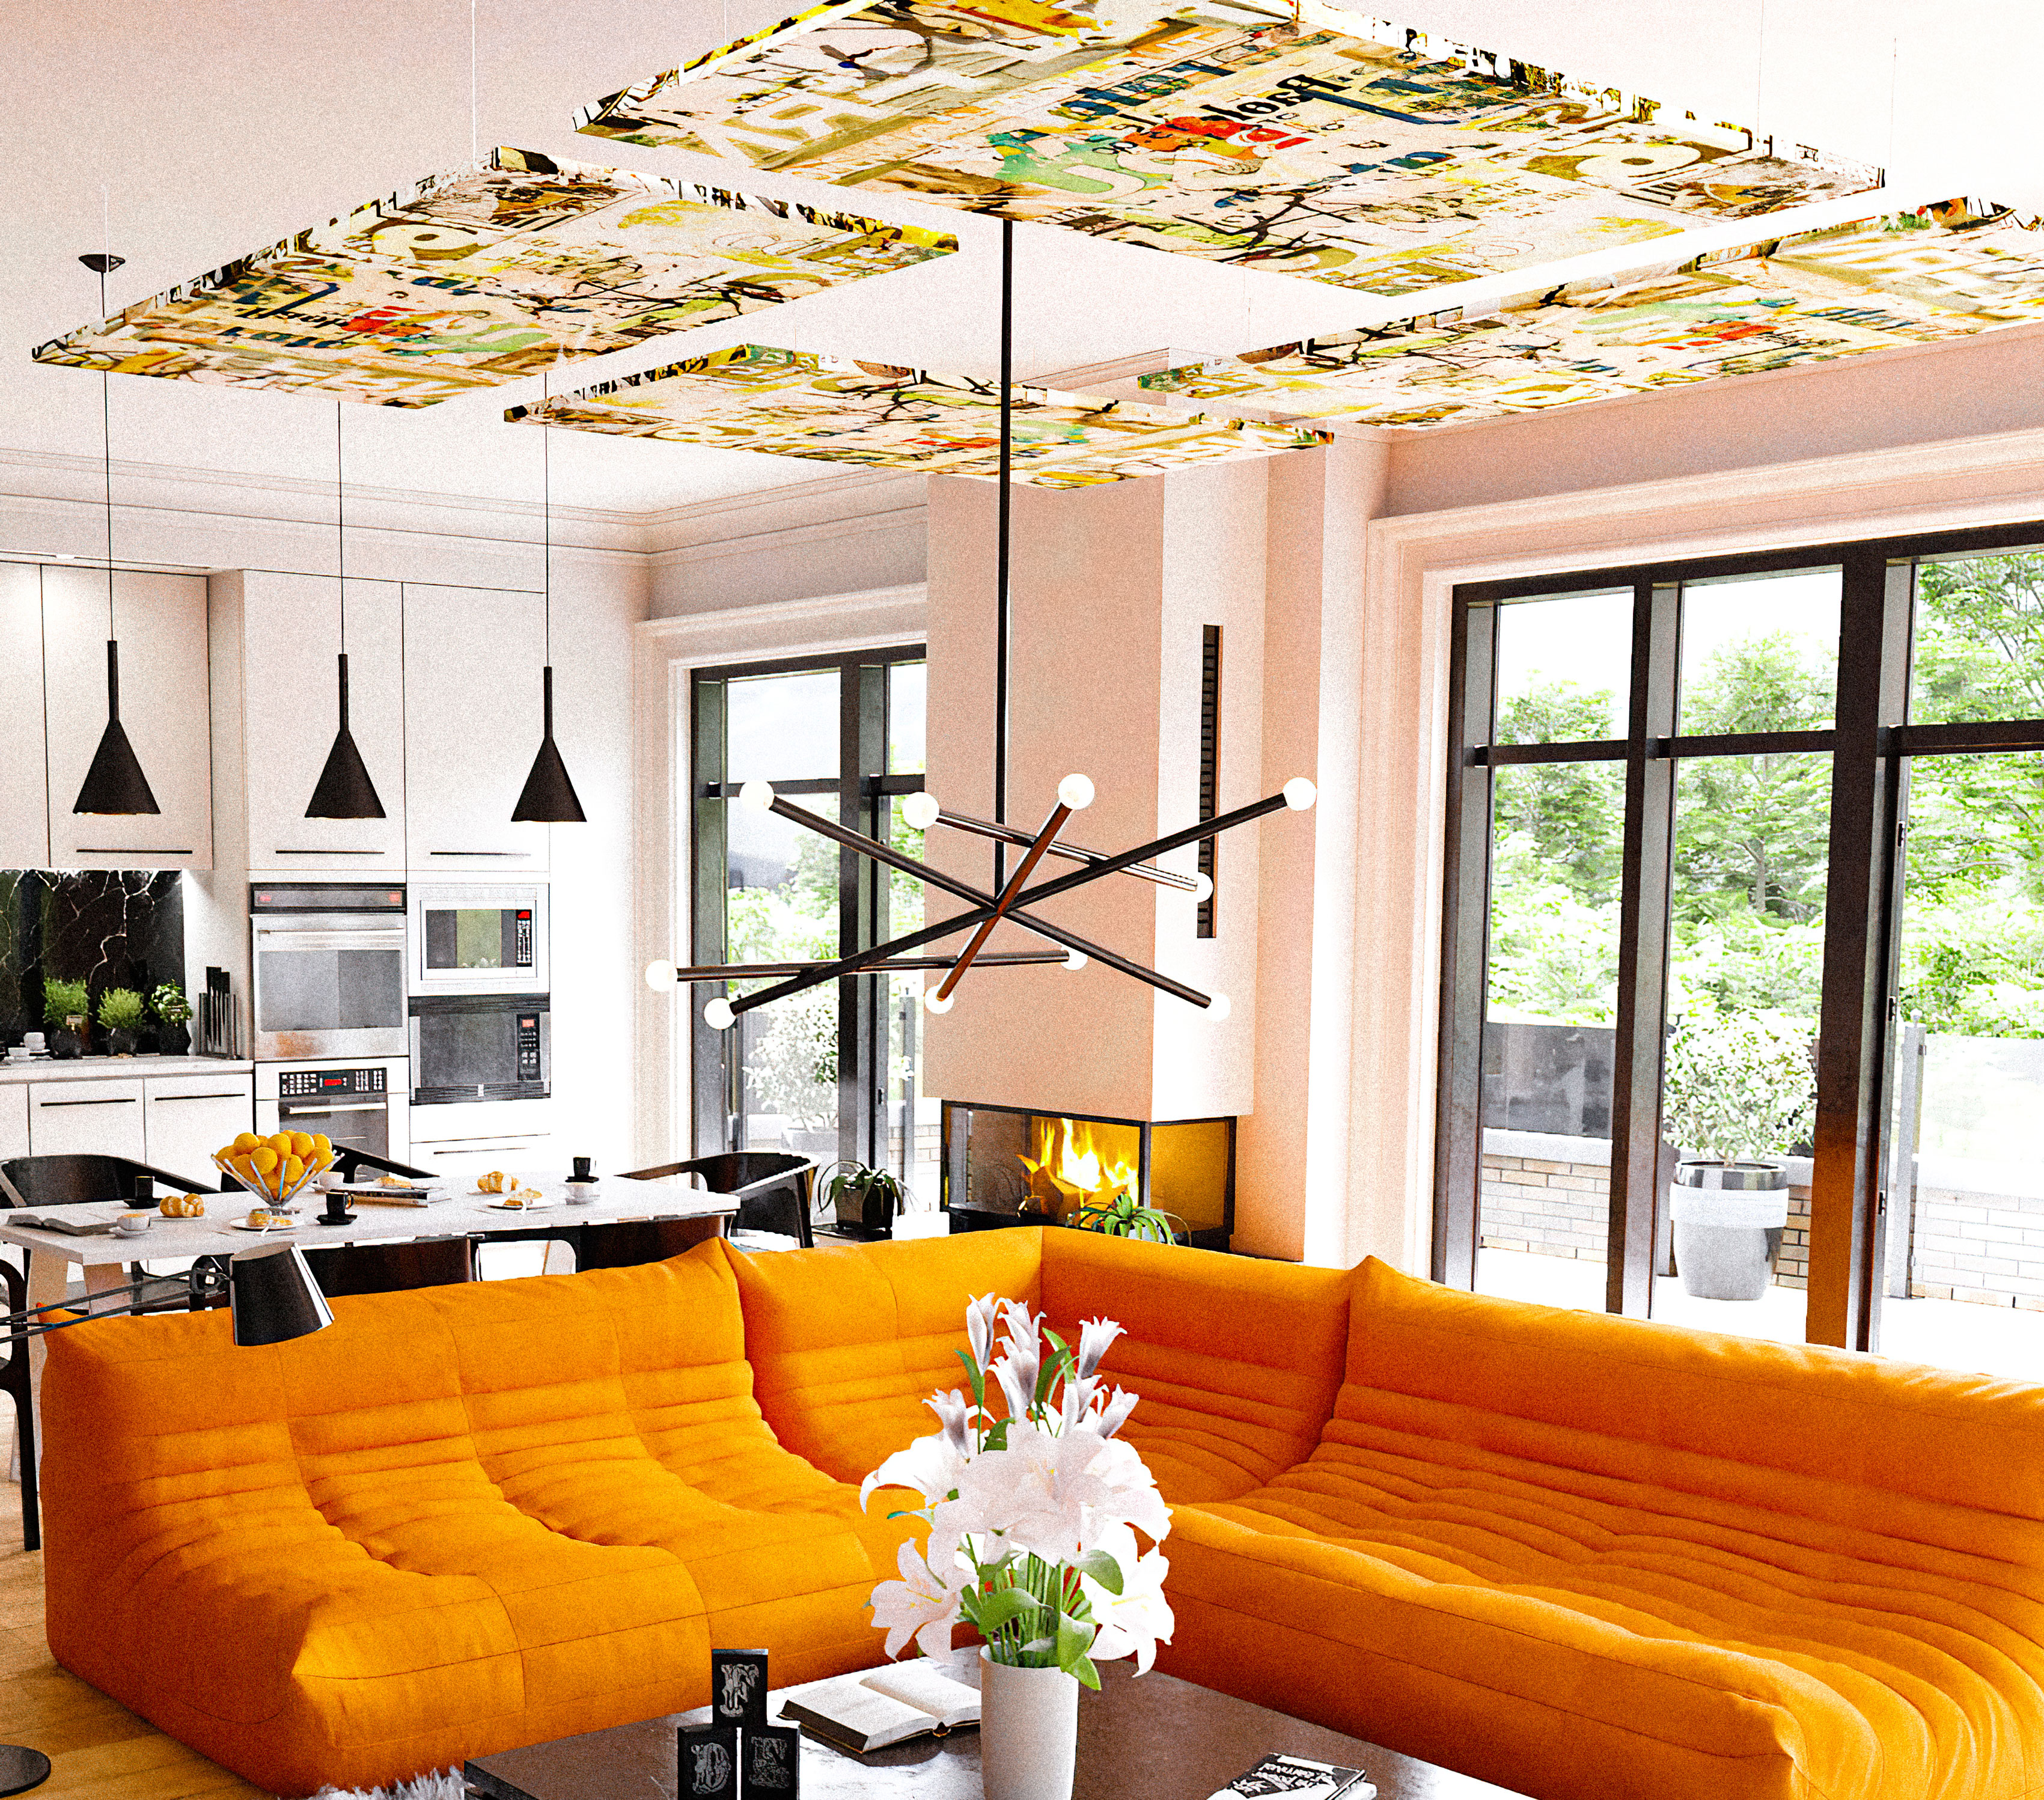
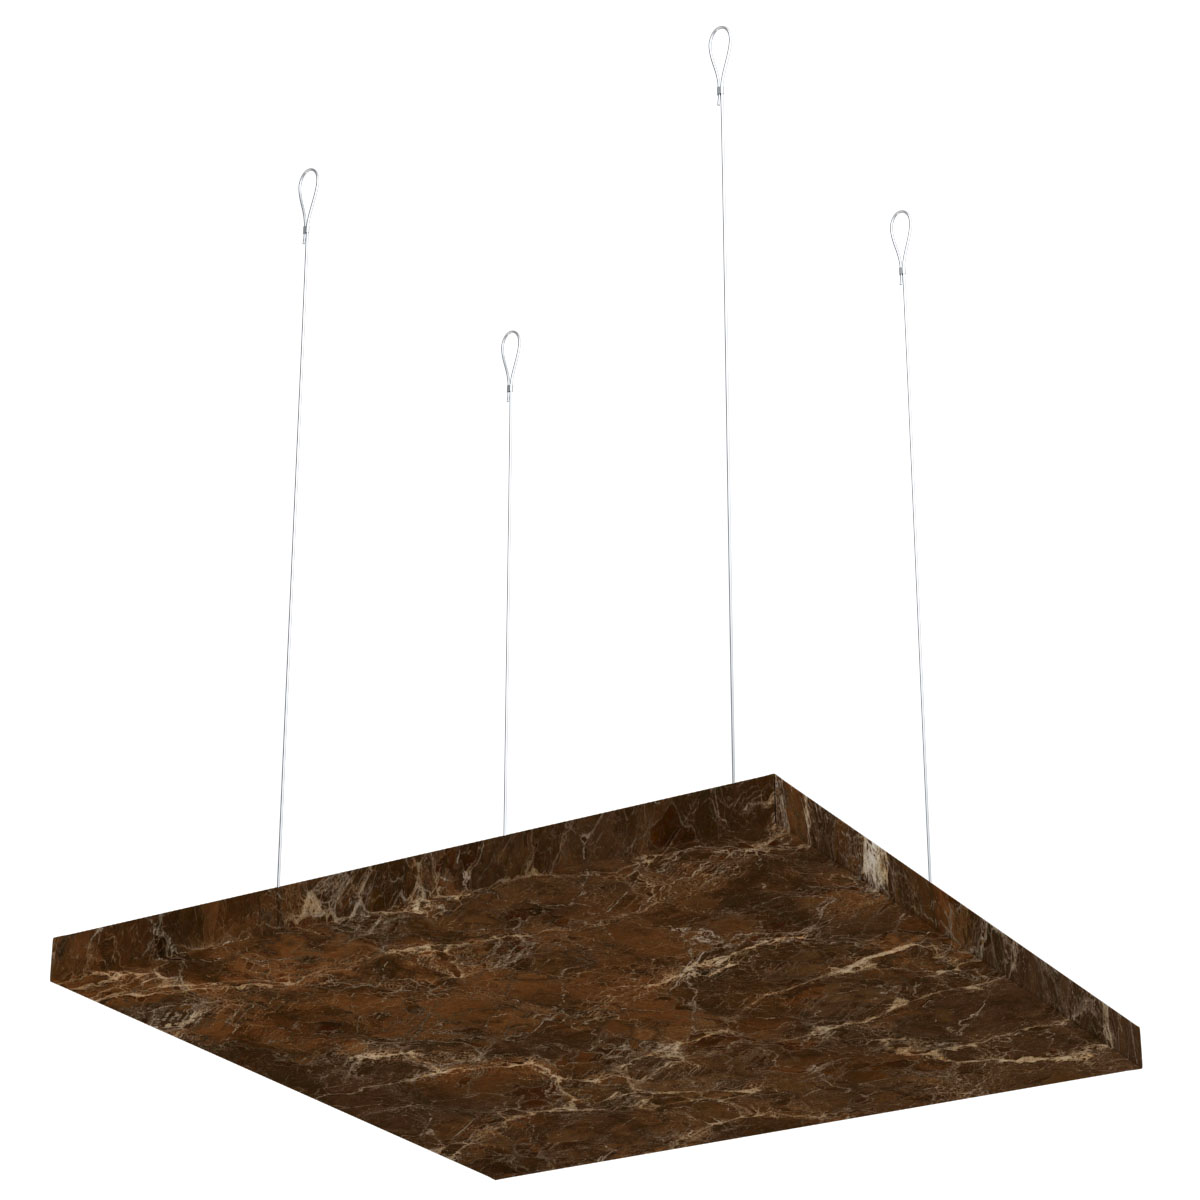
5. Clouds and Baffles, Too
In addition to our decorative wall panels, Audimute also produces custom acoustic image clouds and custom acoustic image baffles. These sound management solutions are suspended from the ceiling to provide sound absorption in rooms with high ceilings or limited wall space.
6. Made in the USA
Every Audimute acoustic panel is assembled by our skilled team at our offices outside Cleveland, Ohio.
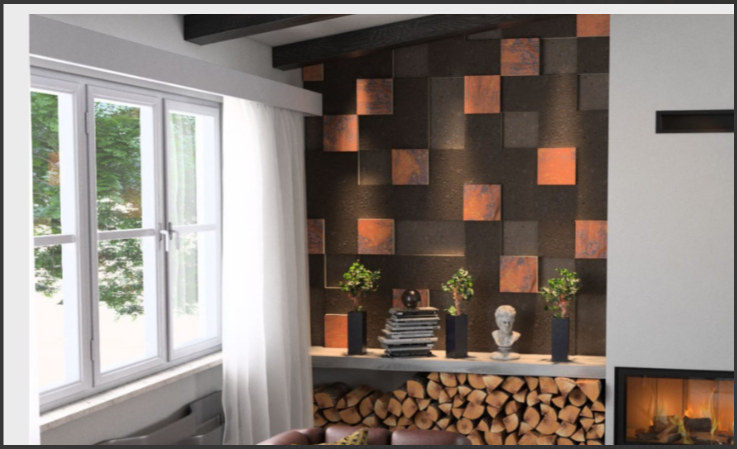
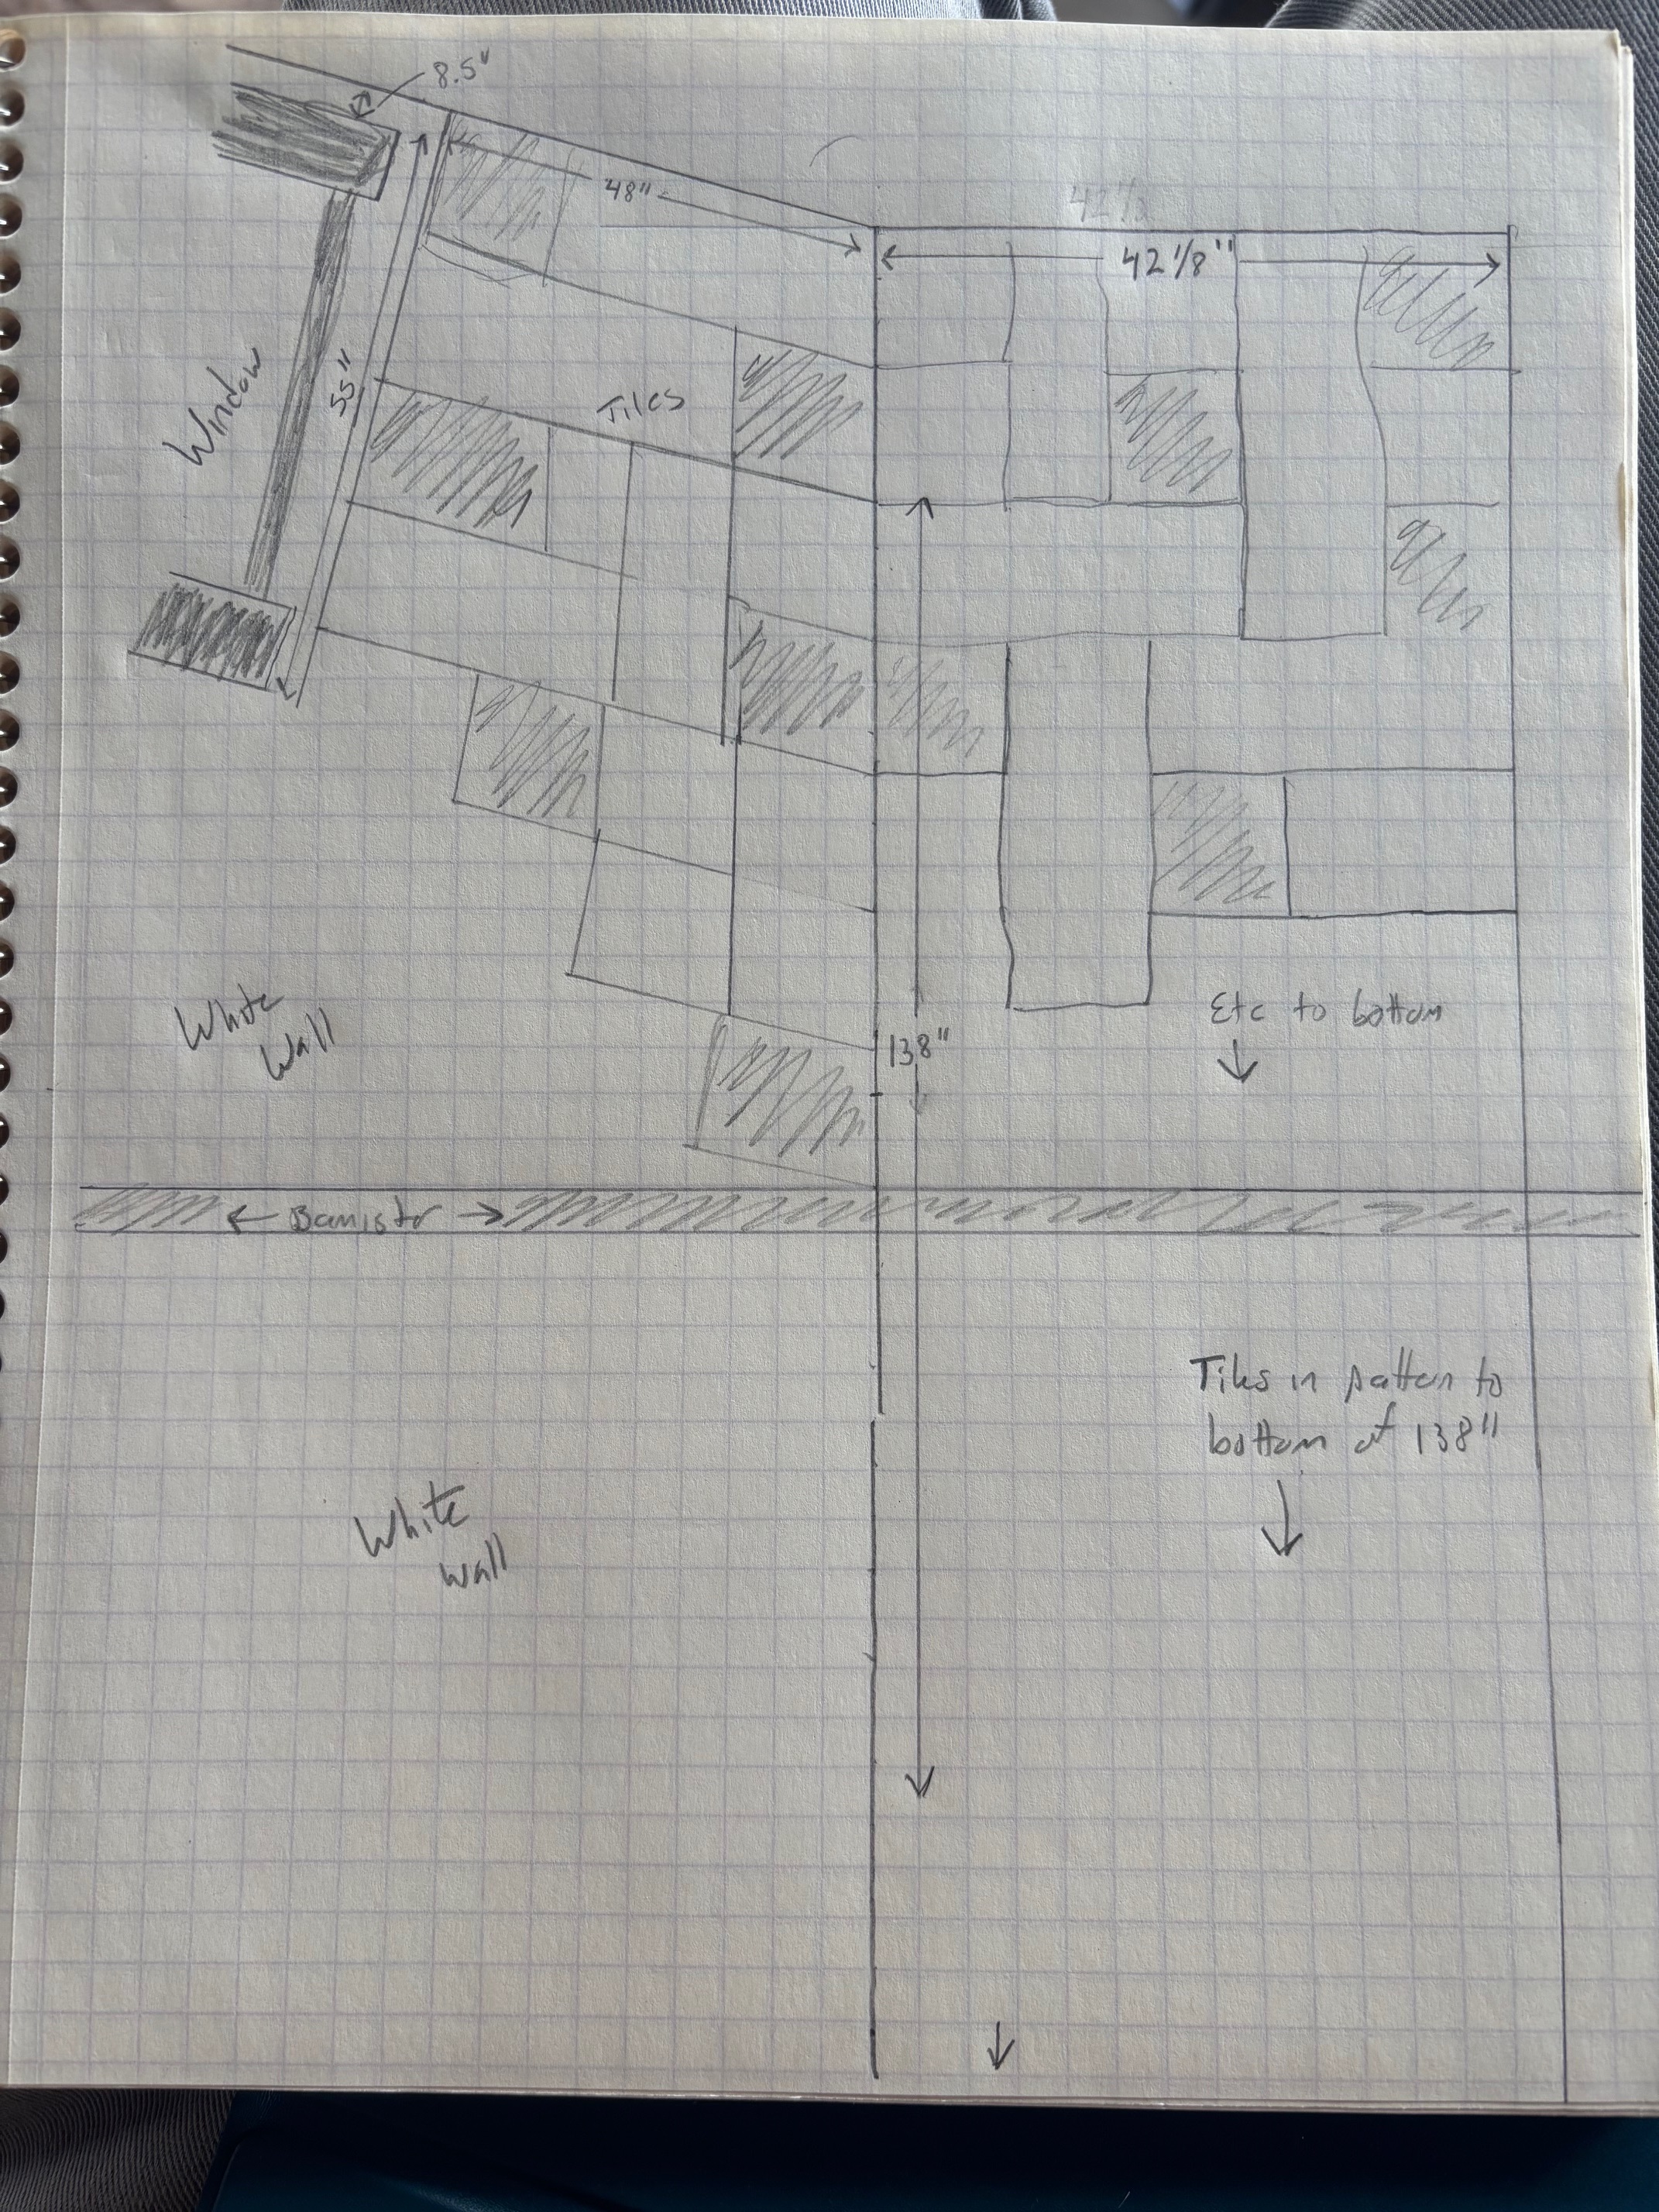
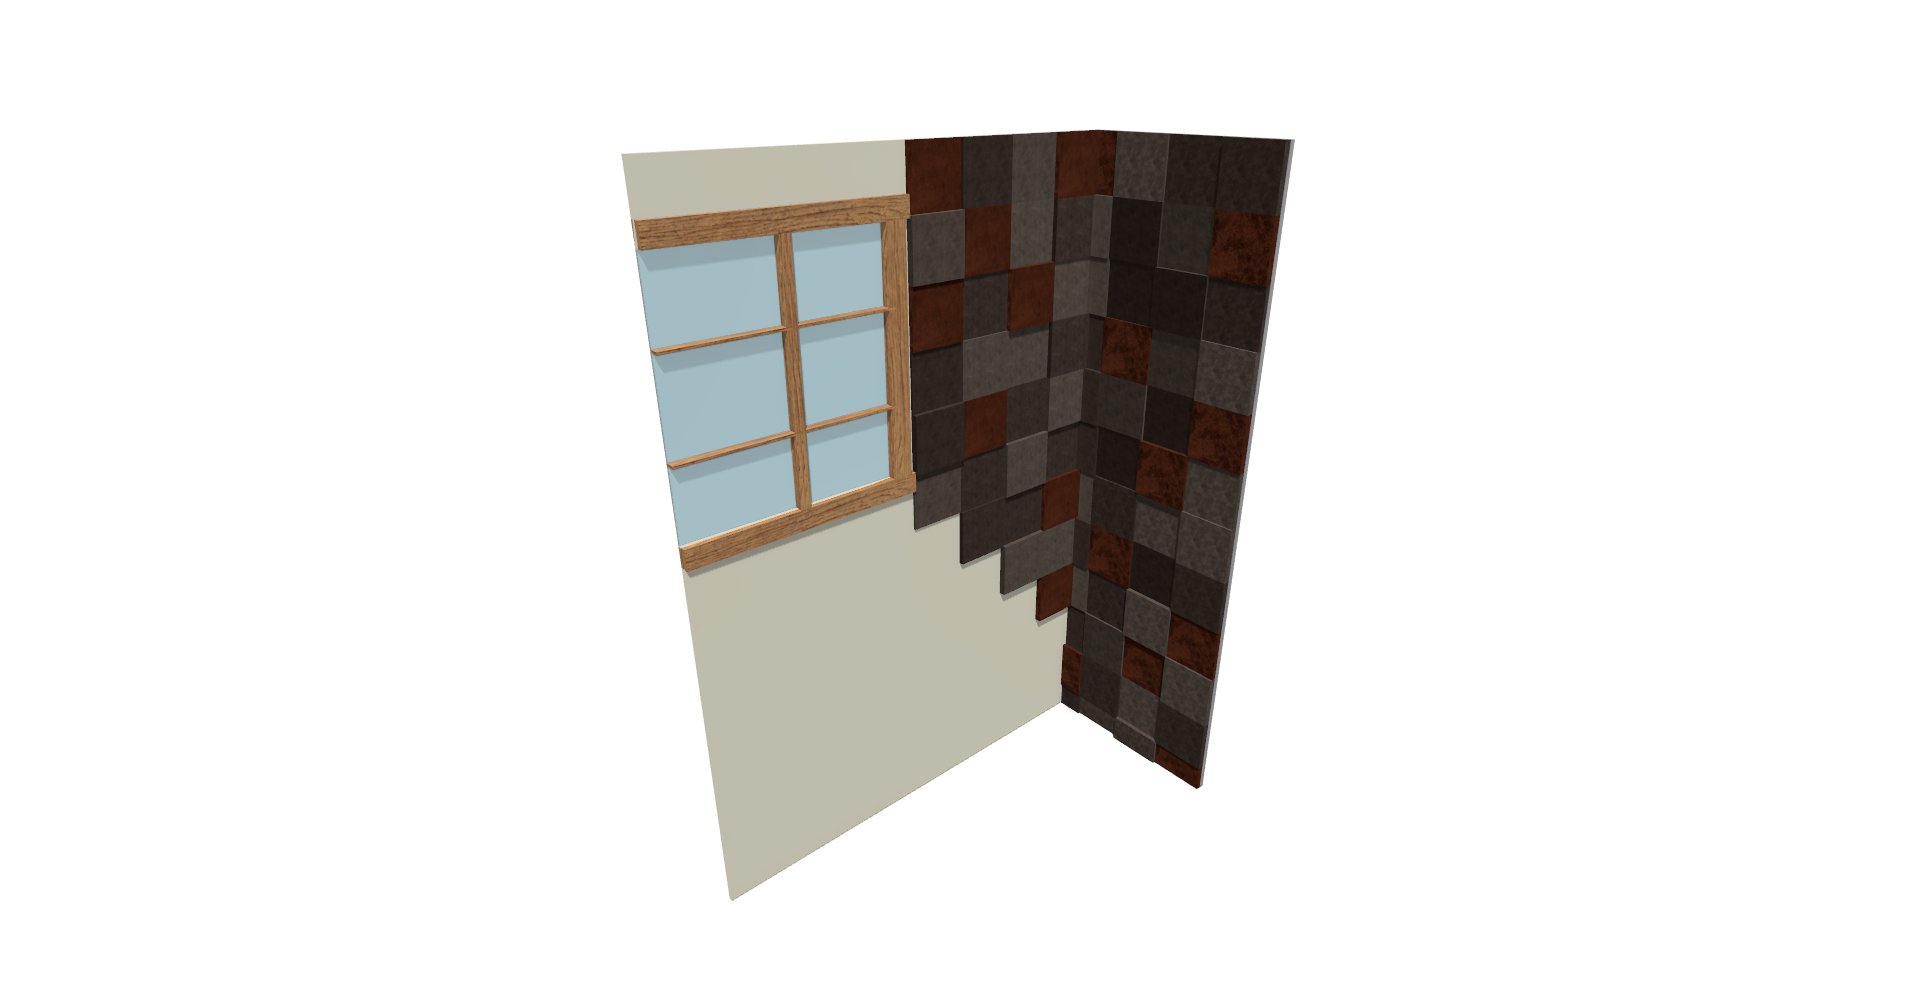
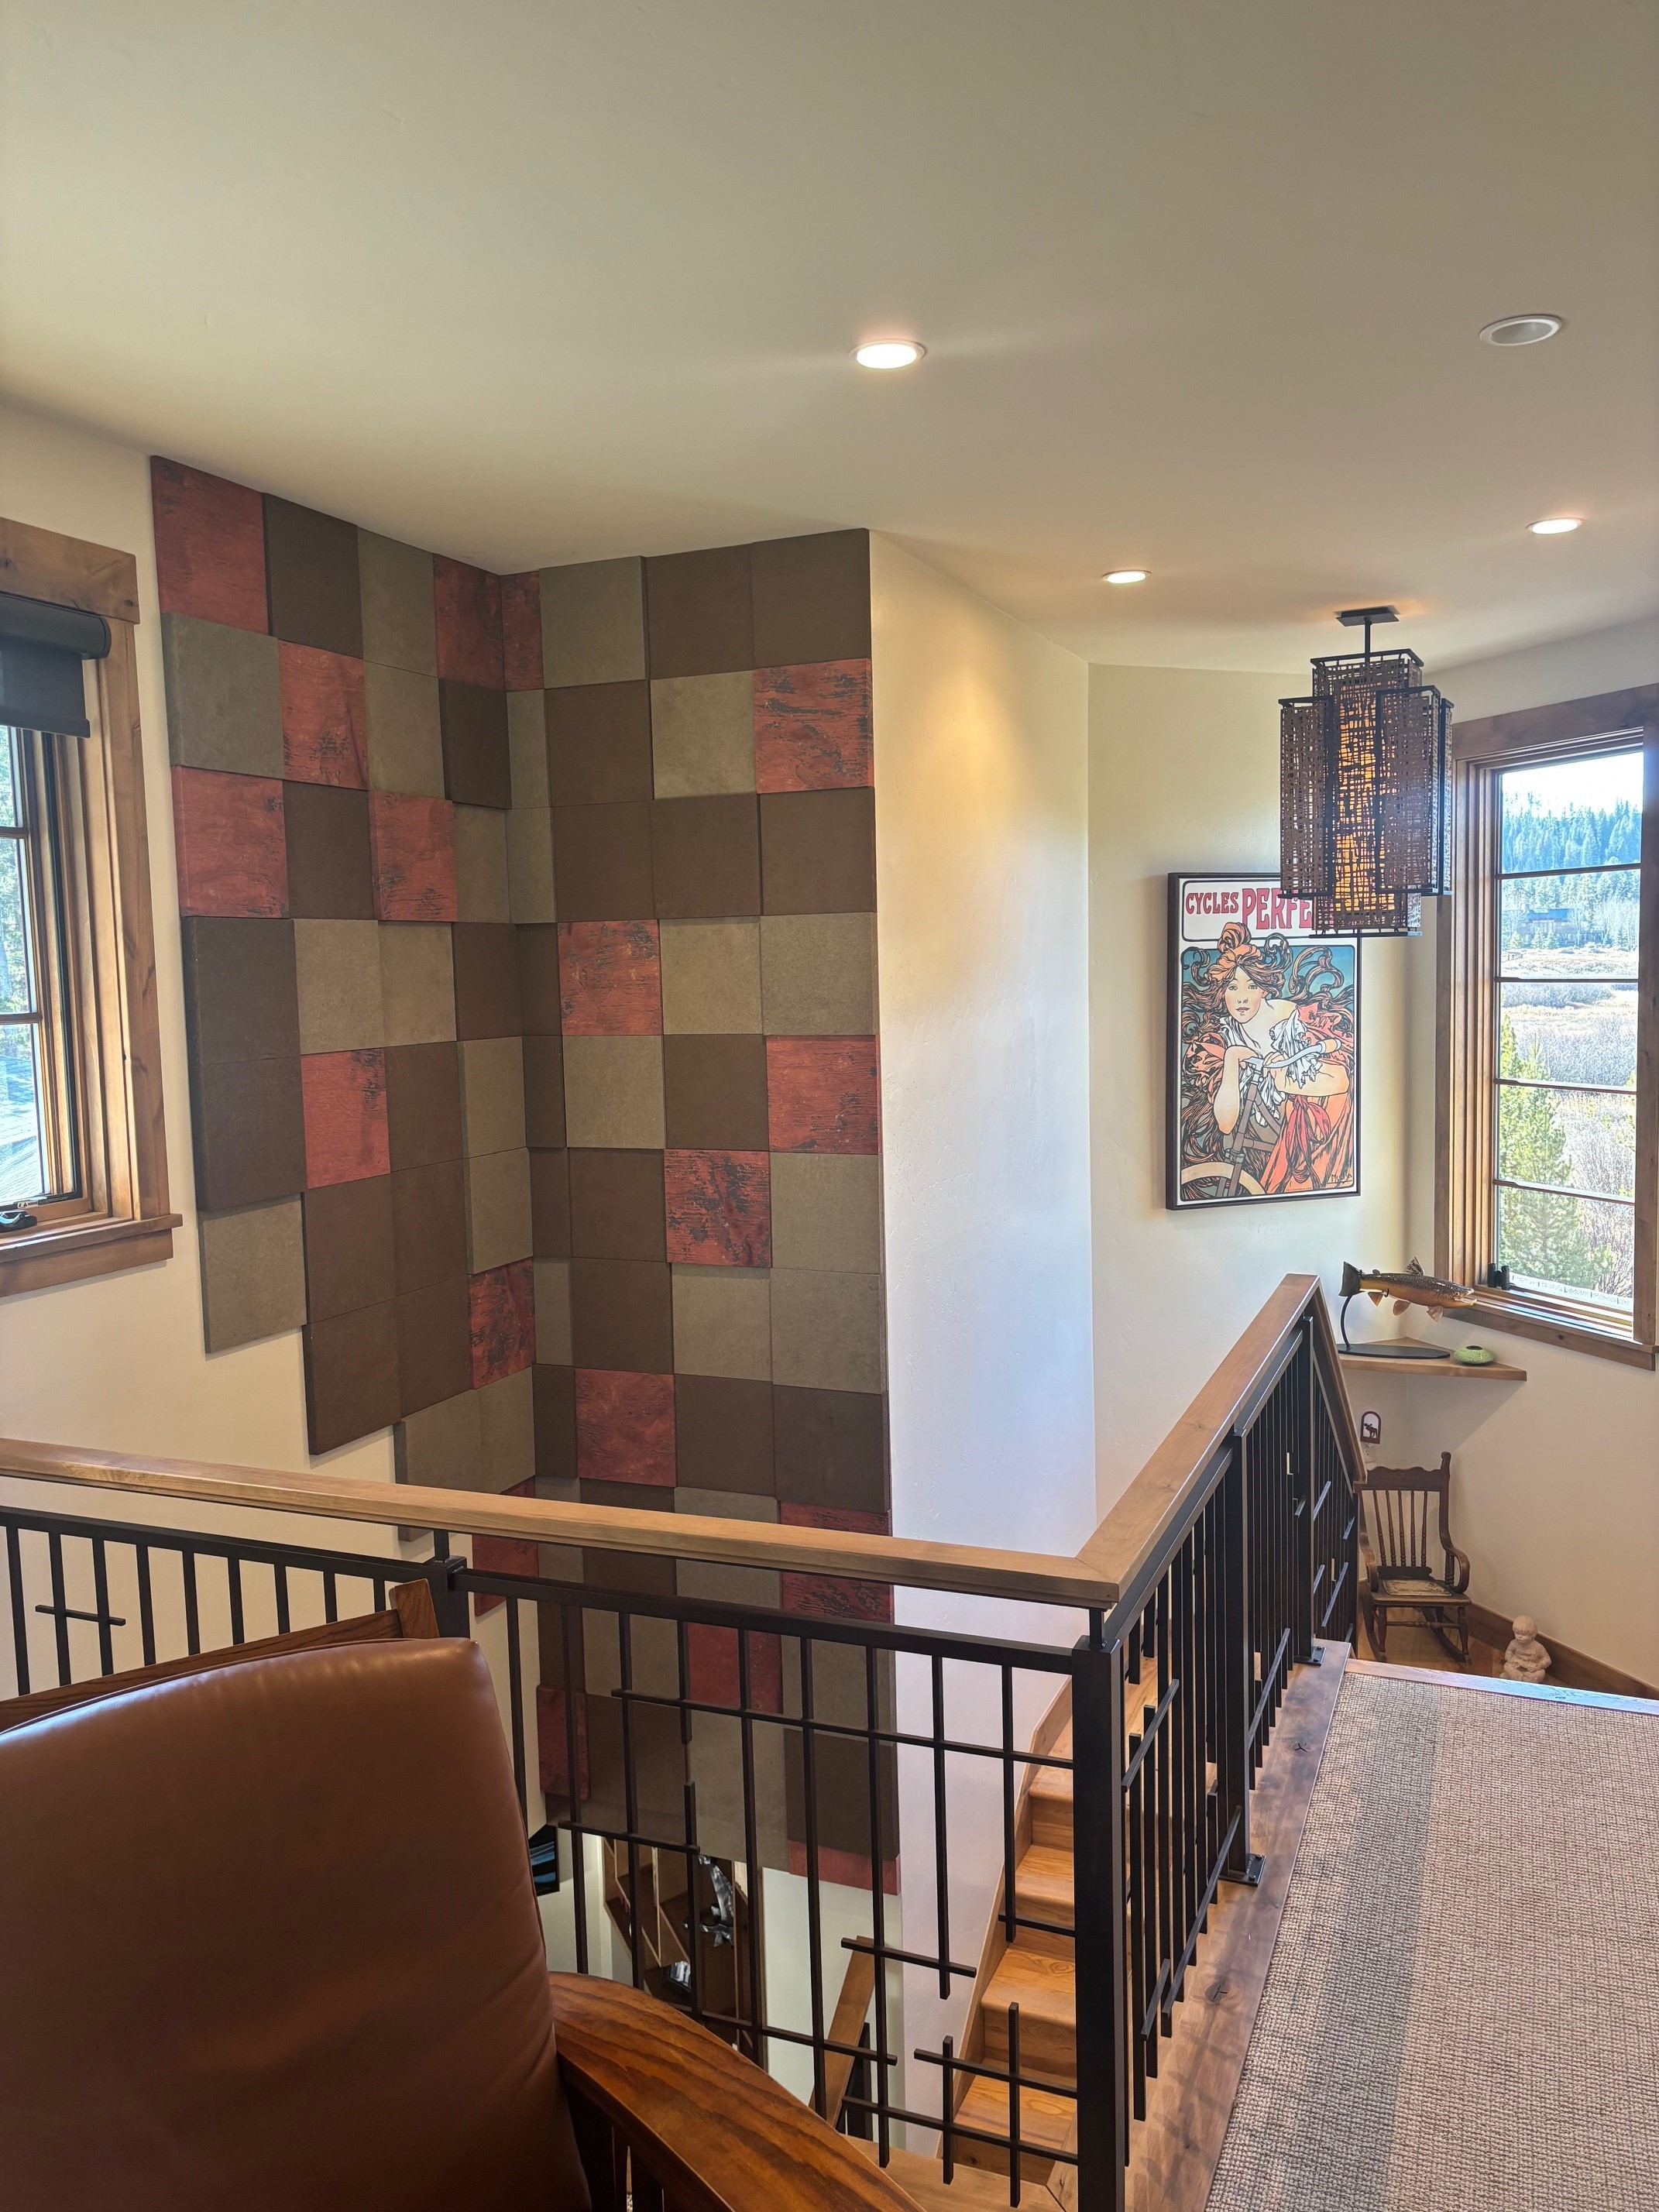
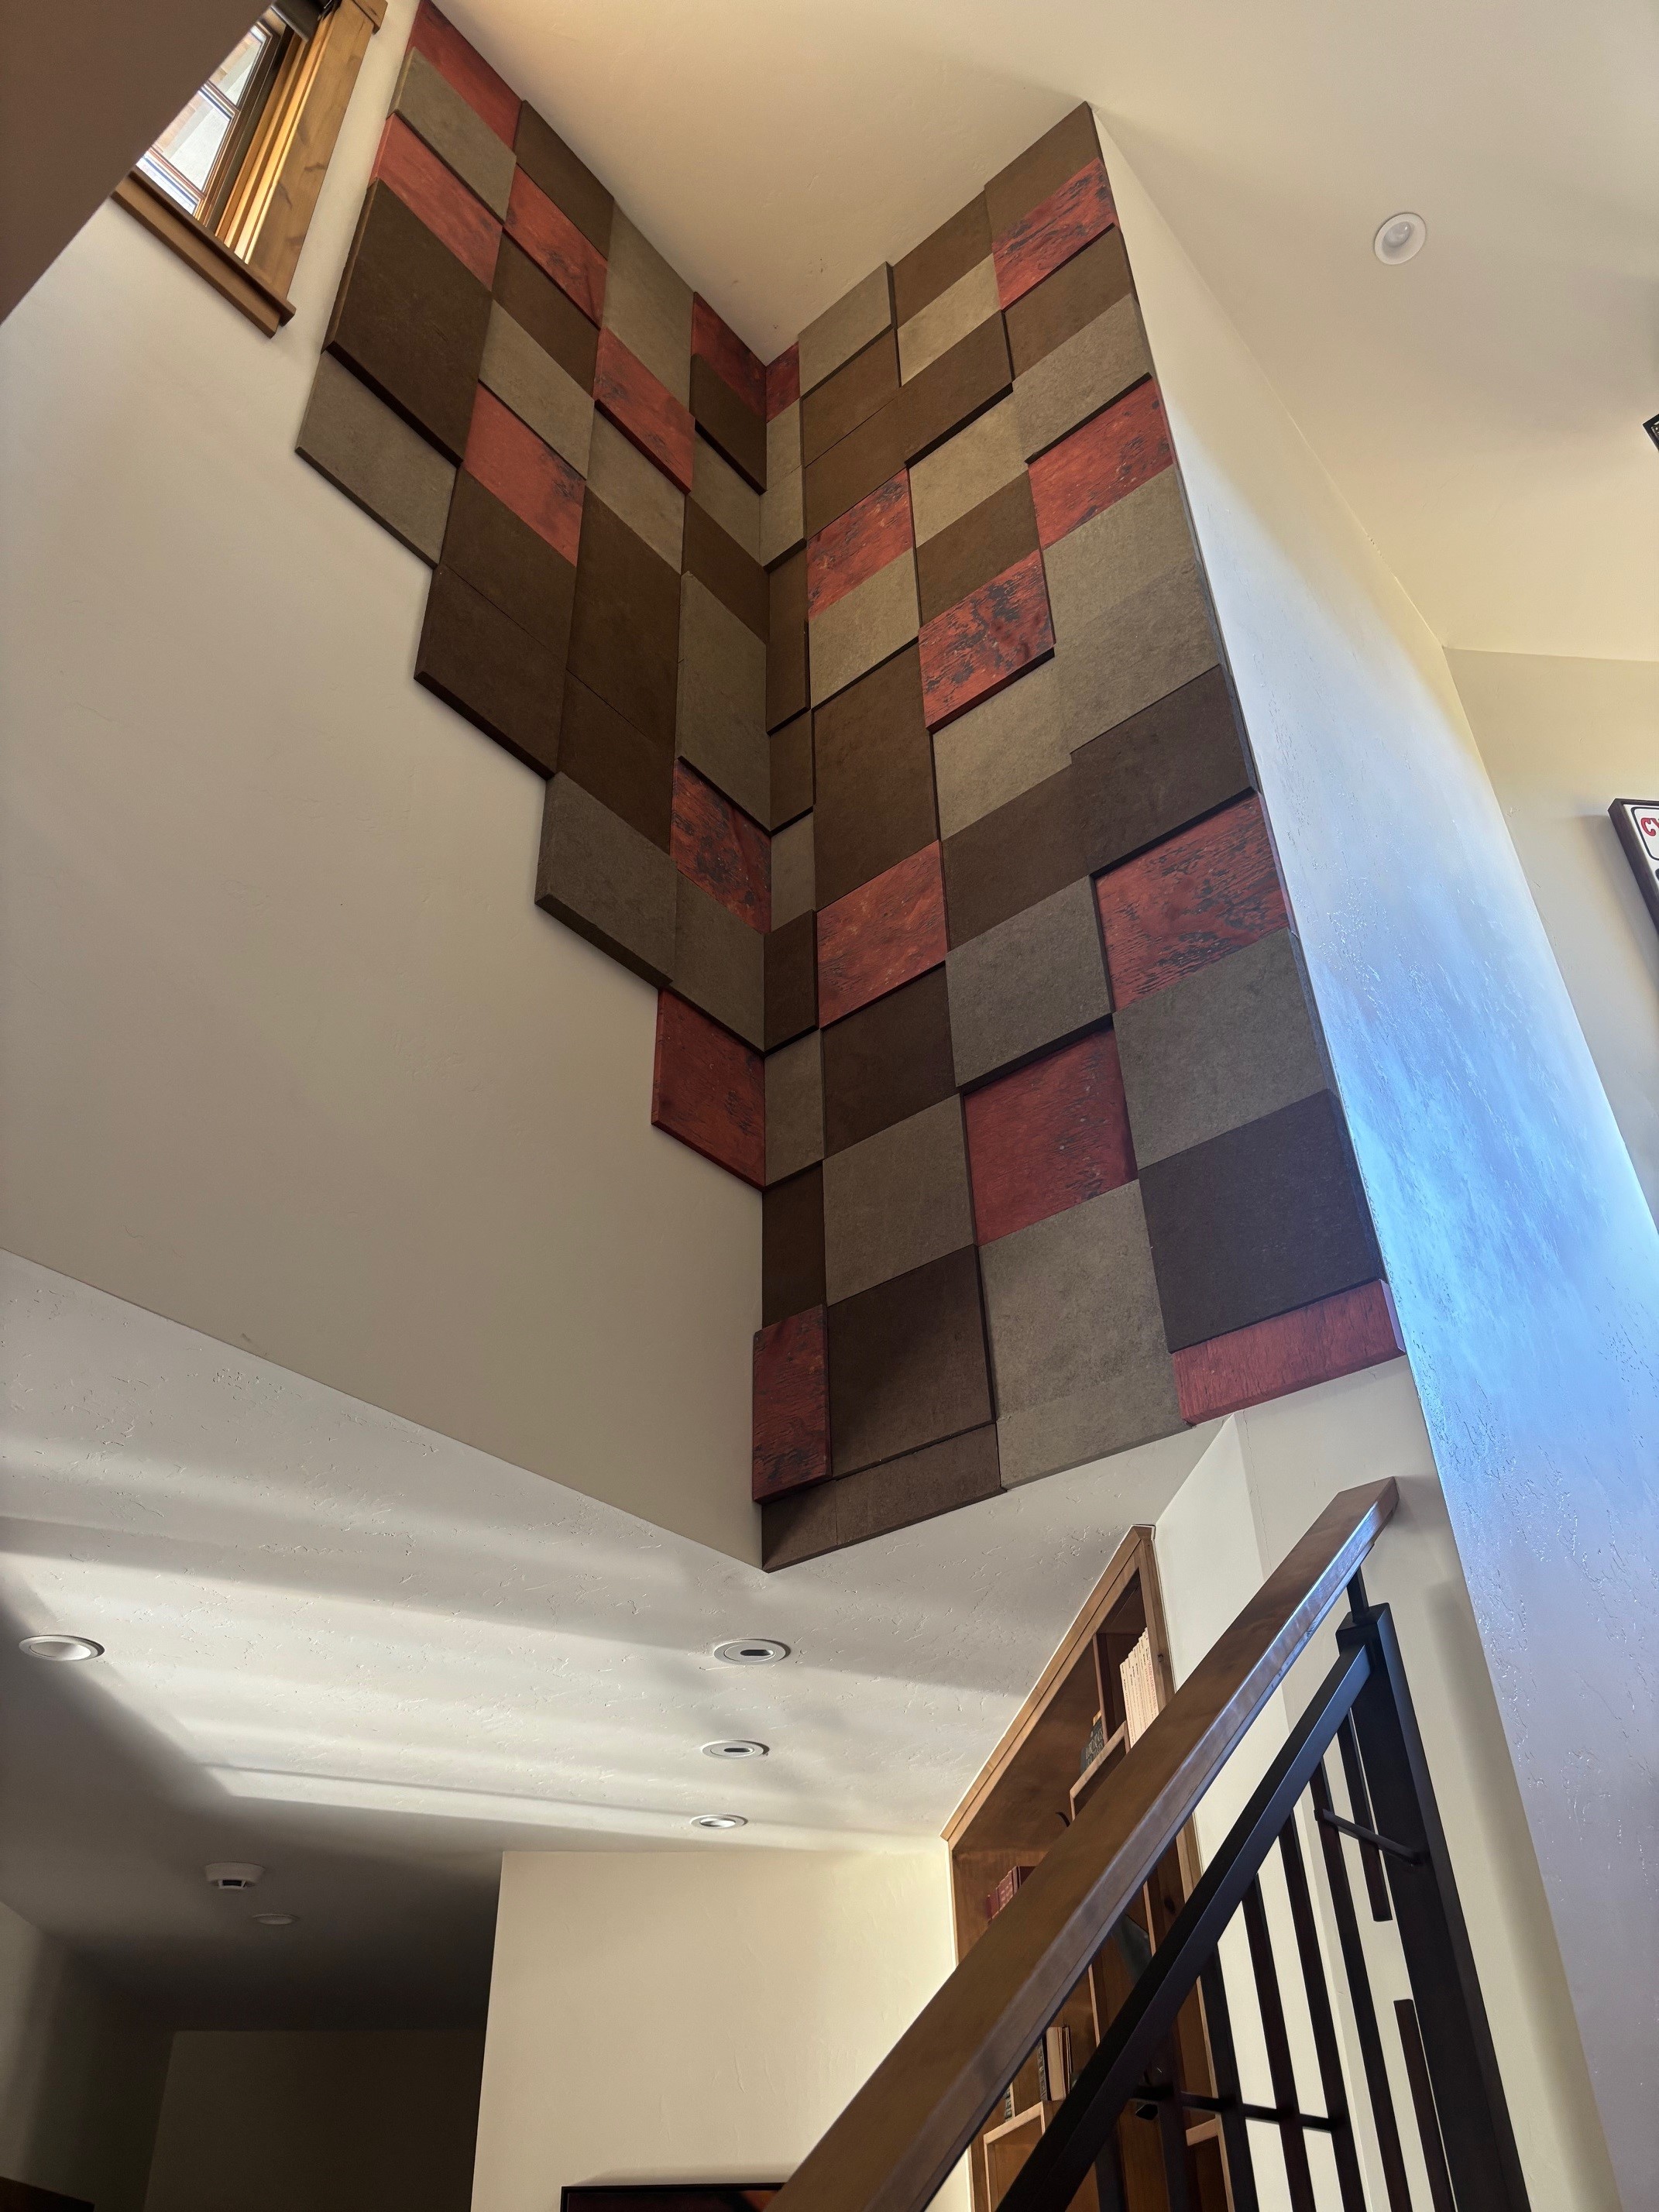
We love when customers come to us with a vision for their sound solution.
Steve and Diana Fitzgerald discovered one of our custom multi-depth designs online and wanted to recreate it for their own home to reduce echoes and reverberations:
The outcome: an immediate improvement in sound quality for the Fitzgeralds, with significant reduction in how much sound was being reflected into the upstairs area.
Thank you, Steve and Diana, for choosing Audimute for your sound management solution!
The United States of America is celebrating its 250th birthday in 2026, and we thought it'd be fun to commemorate America's semiquincentennial by identifying Audimute acoustic panels (all of which are made in the USA) that remind us of each U.S. state.
This week: Kentucky, home to the Bluegrass region, the Cumberland Plateau, and Daniel Boone National Forest.
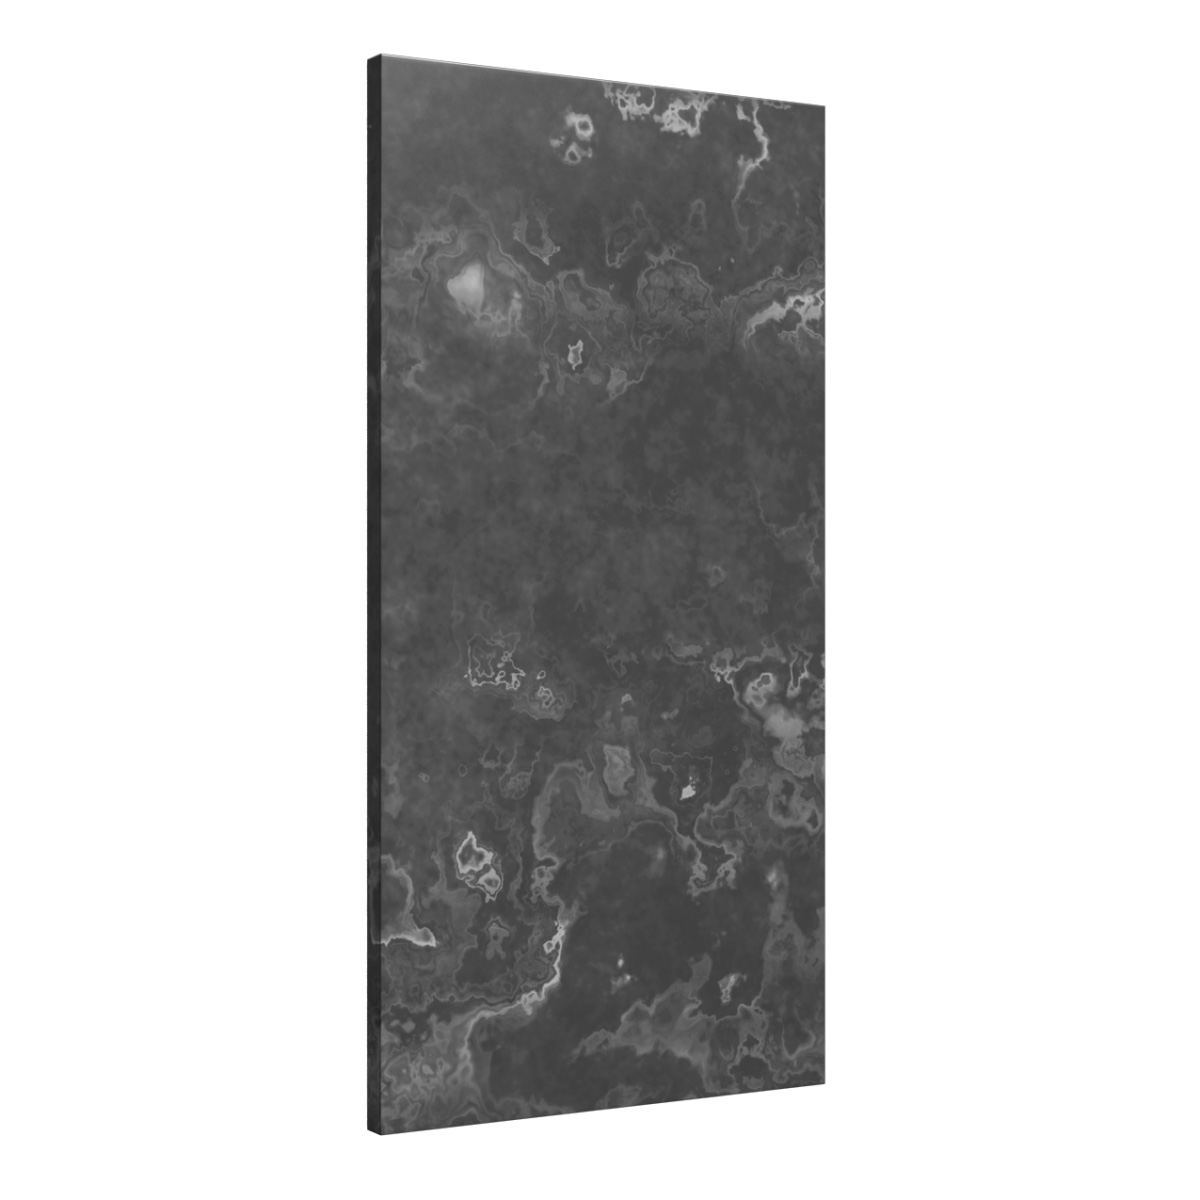
For Kentucky, we chose an Audimute acoustic panel that evokes the dark caverns and stunning rock formations of the state's Mammoth Cave National Park: the AcoustiStone® Premium Acoustic Stone Alternative Ceiling Cloud in the "Deep Brown Marble" style.
Mammoth Cave National Park is home to the longest known cave system in the world. Visitors can venture 250 feet underground to traverse some of the park's 426 miles of subterranean passageways and tunnels and hear how sound echoes and reverberates off the cave walls and ceilings. We're definitely not saying it should BUT if Mammoth Cave National Park should ever want an acoustic treatment for those caves, we'd recommend our eco-friendly AcoustiStone acoustic clouds, which can be fastened to ceilings to absorb 95% of echoes, reverberations, and mid to high frequencies while maintaining the appearance of real stone.
Looking for a sound management solution for your home, business, church, or studio? Call us at 1.866.505.MUTE or fill out a Room Analysis Form to get free advice from our Acoustic Specialists!
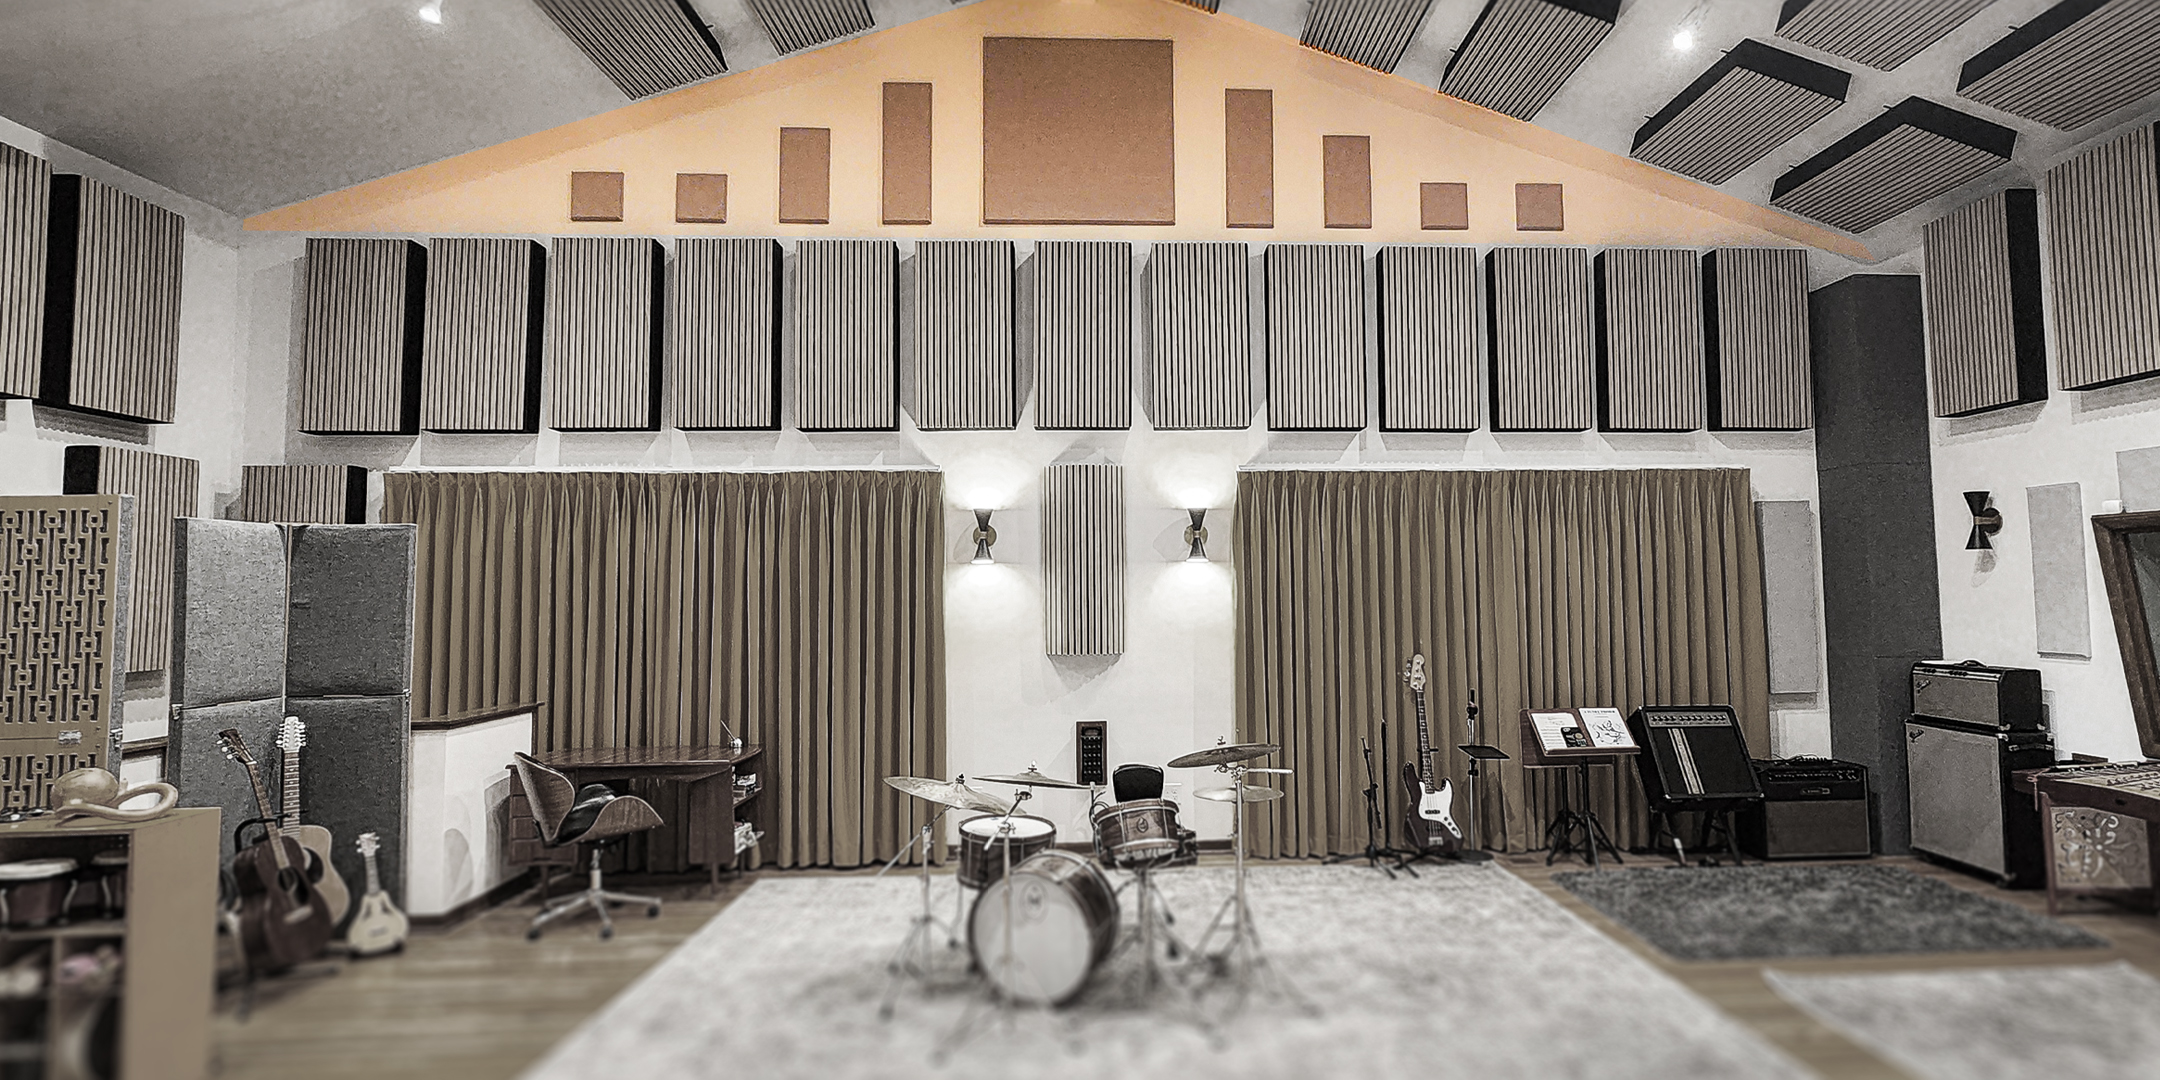
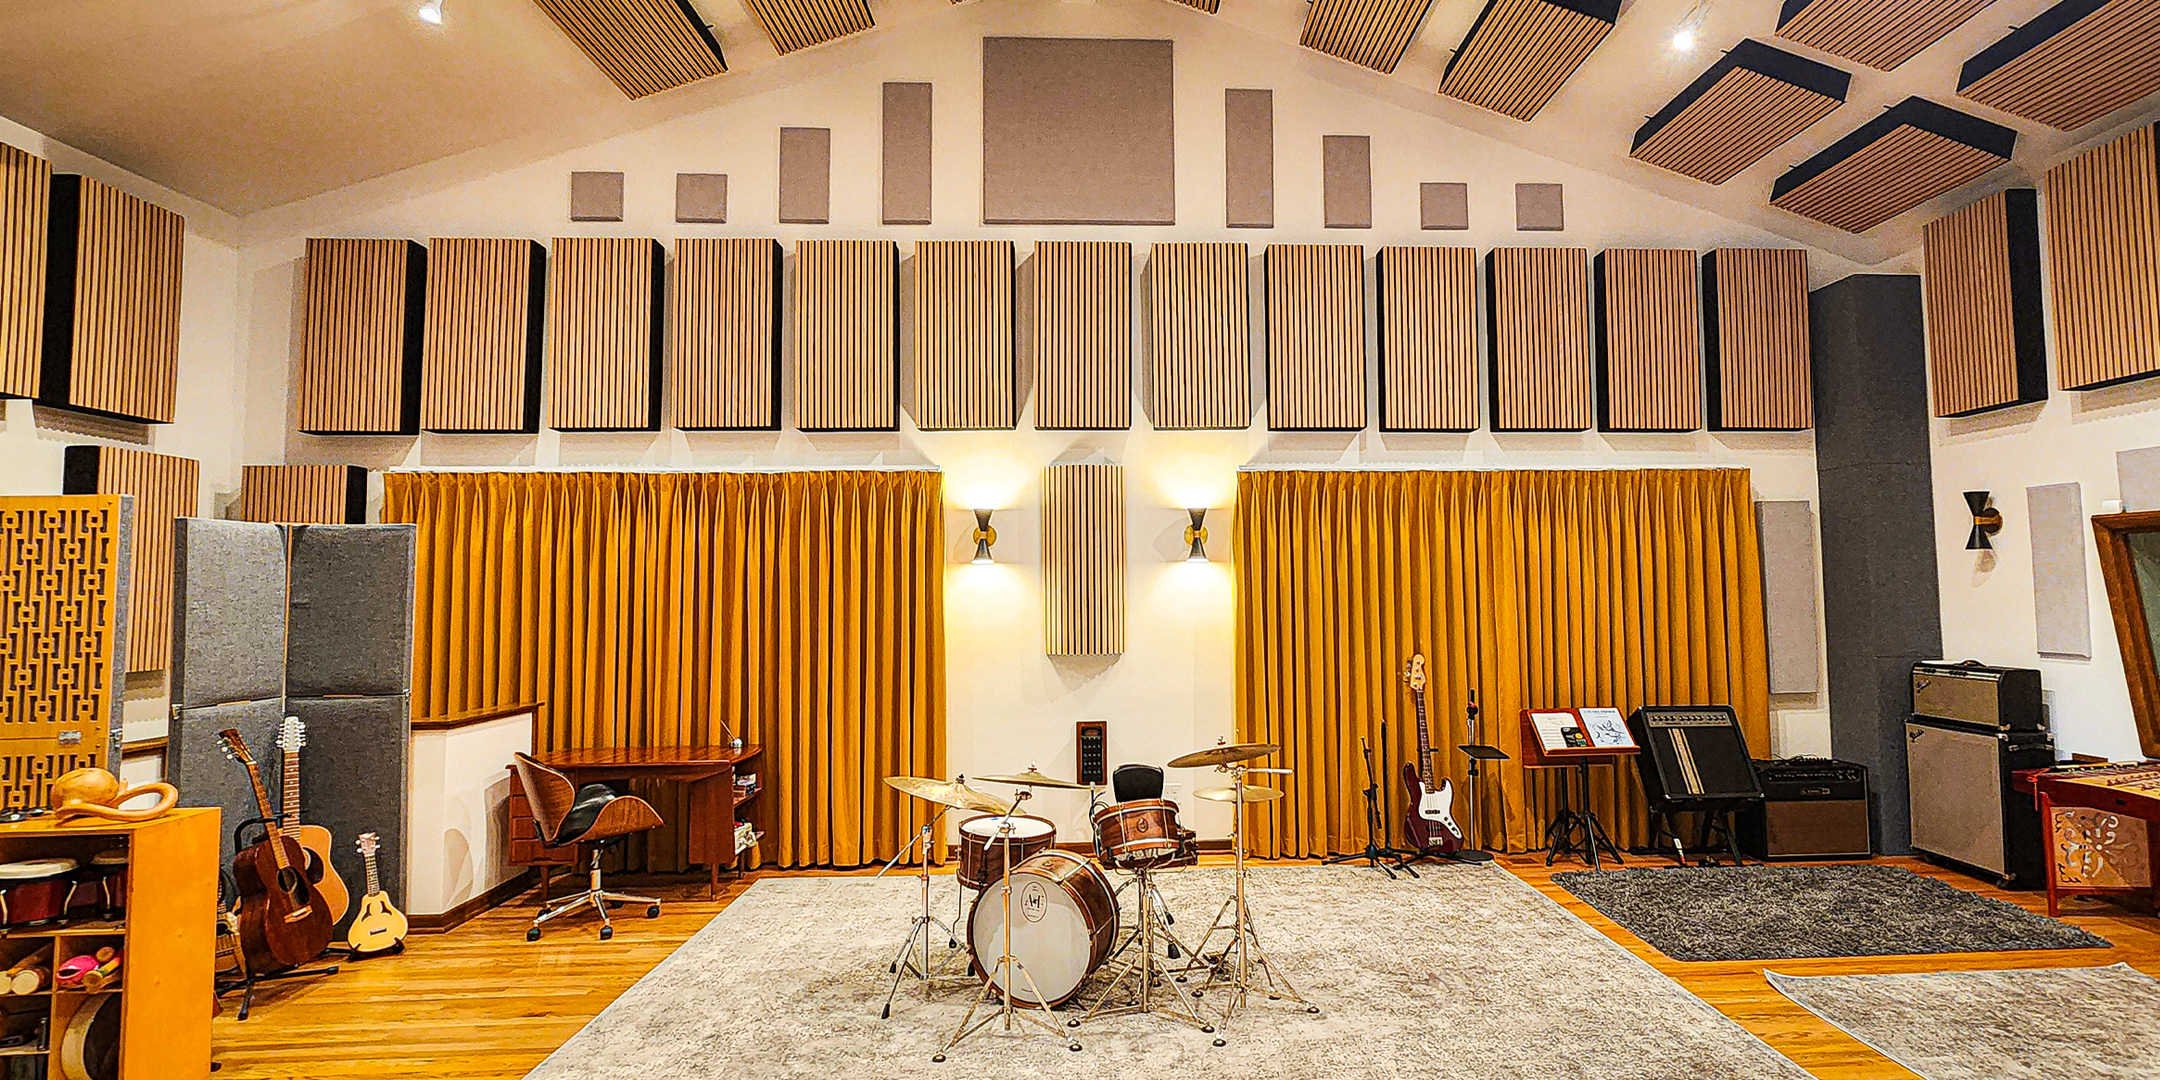
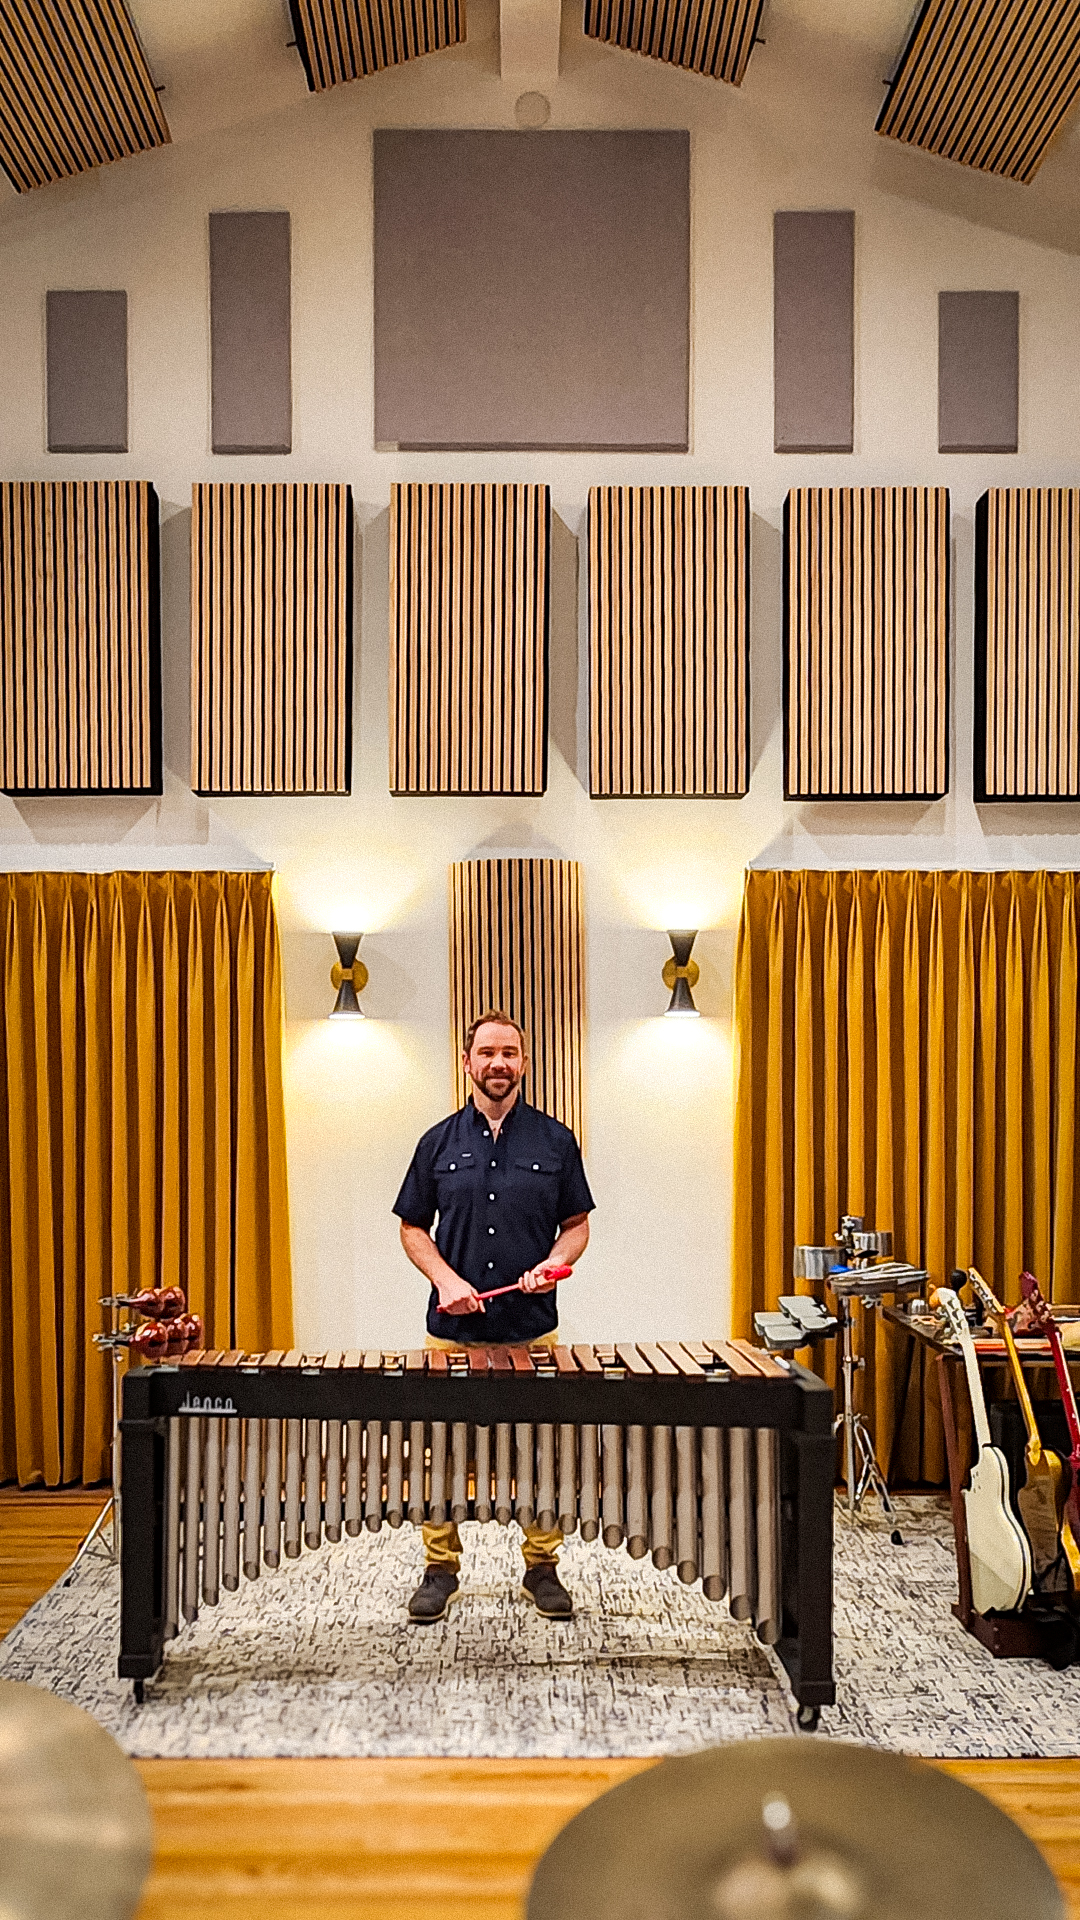
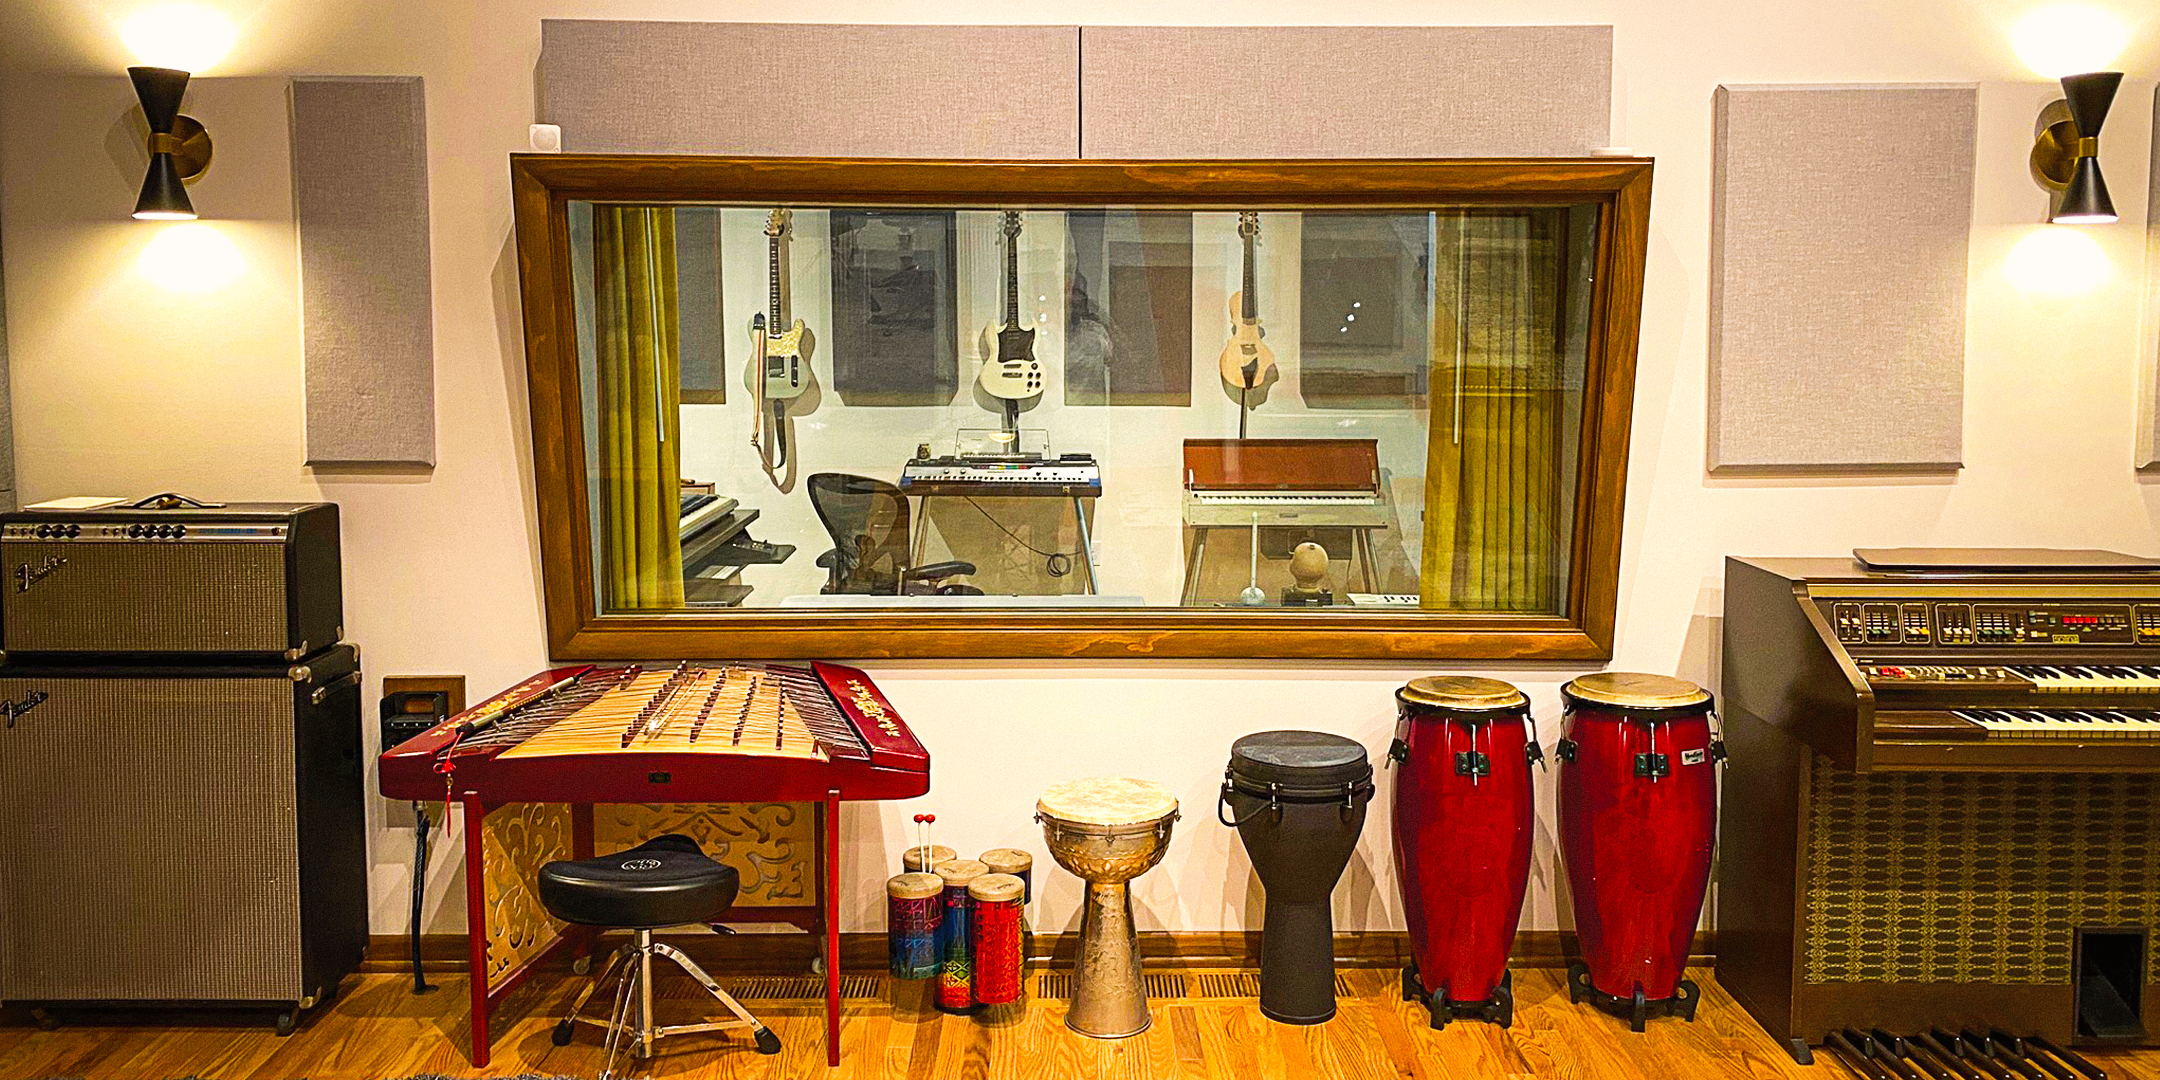
Emmy-winning composer Silas Hite has scored music for film, TV, video games, and commercials, and when he relocated from California to his home state of Ohio a couple years ago, it was crucial that he could have an acoustically treated space to continue that work. "I need to be able to record, mix, and deliver at the highest-quality level audio possible," he says. "This means having great-sounding rooms."
As Silas began work on his new studio, he soon ran into a sound problem that his initial acoustic treatment wasn't solving. "I was still getting some high frequency flutter in my tracking room," Silas says. "I was fairly certain it was coming from the sound waves bouncing off of the untreated parts of the walls."
Enter Audimute. Silas turned to us for lightweight, sound-absorbing solutions that could treat the flutter echo while also fitting in with the design of his studio. Our Fabric Acoustic Panels wrapped in textiles of Silas's choosing were fastened to various reflective surfaces around the tracking room, while six additional 4' x 4' panels were added to the ceiling of his control room to address additional acoustic issues.
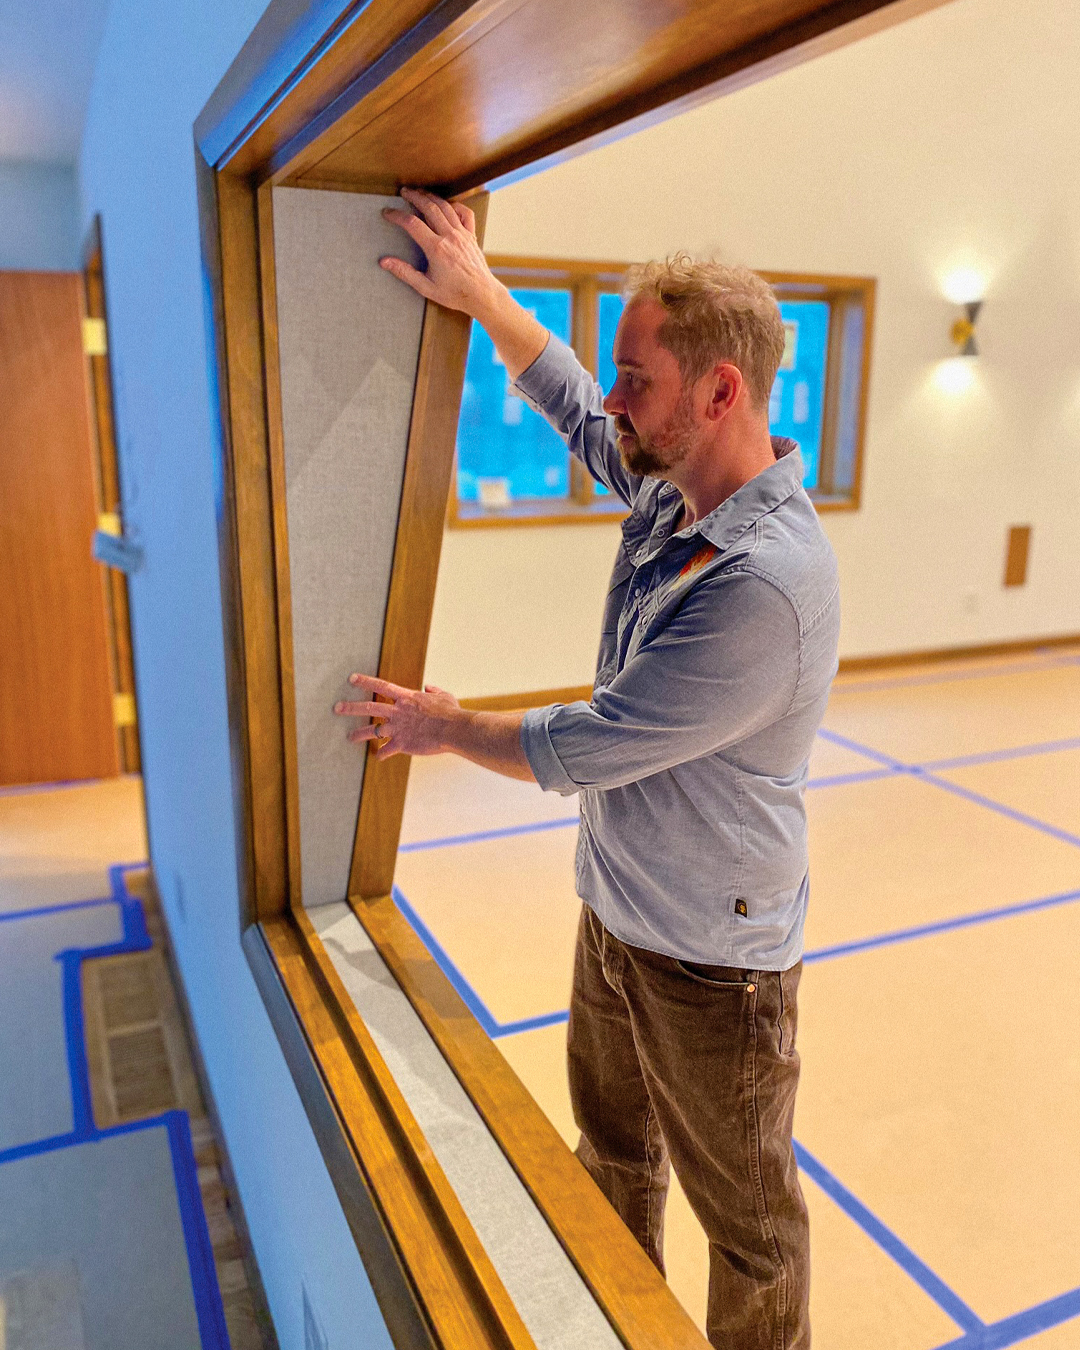
Silas also worked with Audimute to install sound-absorbing material in the space within the double-paned window separating his studio's tracking and control rooms. "The window is handmade and the woodwork is beautiful, so I wanted the [look of the] sound treatment inside the window to complement it," Silas says. "With Audimute, I was able to customize the fabric to my taste."
The outcome is a studio that sounds incredible while also staying true to Silas's aesthetic vision. Thank you, Silas, for letting Audimute be a part of your success story.
You can learn more about Silas and check out some of his work at silashite.com.
The United States of America is celebrating its 250th birthday in 2026, and we thought it'd be fun to commemorate America's semiquincentennial by identifying Audimute acoustic panels (all of which are made in the USA) that remind us of each U.S. state.
This week: Idaho, home to Lake Coeur d'Alene, the Sawtooth Mountains, and the majestic Shoshone Falls.
For Idaho, we chose an Audimute acoustic panel that evokes the charred terrain of the state's famed Craters of the Moon National Monument and Preserve: the AcoustiStone® Premium Acoustic Stone Alternative Panel in the "Charcoal Smooth Marble" style.
The Craters of the Moon National Monument and Preserve is the site of three major lava fields and multiple cinder cones. Its smoky black surface brings to mind a volcanic landscape on a distant planet. Our eco-friendly AcoustiStone acoustic panels are similarly out-of-this-world, absorbing 95% of echoes, reverberations, and mid to high frequencies while giving the appearance of real stone.
Looking for a sound management solution for your home, business, church, or studio? Call us at 1.866.505.MUTE or fill out a Room Analysis Form to get free advice from our Acoustic Specialists!
Give the gift of great sound this holiday season with Audimute! For a limited time only, our Custom Image Acoustic Panels are 10% off when you use the promo code IMAGE at checkout.
Upload an image such as a family photo, pet portrait, business logo, or piece of original artwork and we'll print it on acoustical fabric wrapped around Audimute's signature sound absorption material, eco-C-tex®.
Each Custom Image Acoustic Panel absorbs an average of 95% of echoes and reverberations to improve sound clarity within a space. It's wall art that works harder for you!
A Custom Image Acoustic Panel makes a great gift for:
Grandparents who want a beautiful family photo and better sound quality at home
Spouses & Significant Others who love personalized gifts celebrating milestones and special moments
Business Owners that want to showcase their brand while improving workplace acoustics
Musicians who need crisp, clear sound in their home studio
and more!
To ensure delivery of your Custom Image Acoustic Panel by December 25: order your panel (with uploaded image) by December 15 and approve proofs of your order by December 17.
Free shipping is available for the following panel sizes: 1'x1', 1'x2', 1'x3', 1x4', 2'x2', 2'x3', 2'x4'. Panel sizes 3'x3' and larger will be shipped via FedEx Freight at an additional cost.
When sound vibrations from a drum set, appliance, or speaker resonate into the floor of a home or apartment, it often wreaks havoc on those in the room or unit below. These structural noises, as opposed to sound waves traveling through the air, can be difficult to control and require a sound management technique known as decoupling.
What is Decoupling?
Decoupling is the separation of two connected surfaces or items so that sound energy (in this case, vibration) does not easily transfer between them. For example, if you place your iPhone directly on a hardwood floor and it vibrates from a notification or incoming call, the vibration travels through the floor and can be felt across the room. But if you place the iPhone on a pillow before setting it on the floor, the pillow absorbs much of the vibration, preventing it from easily reaching the floor and making the vibration much less noticeable.
The same principle applies to larger items that produce vibration noise: speakers, subwoofers, amplifiers, drum sets, even household appliances. By placing a buffer between these items and the surface on which they stand, vibration noise can be dramatically reduced.
How to Decouple Vibrating Items
Thick rugs and carpets are good "shock absorbers" and can help reduce vibration or impact noise when placed underneath vibration-producing instruments or equipment.
Foam mats or special pads like Audimute's Peacemaker® Isolation Pad (made from 100% recycled rubber) can also be used for larger items like drum sets, speakers, amps, subwoofers, or office applicances.
If you're seeking to reduce vibration or impact noise across a wide area, a more substantial soundproofing solution might be required. While it's not an option for everyone, the addition of a "floating floor" with a layer of a product such as Audimute's Peacemaker® Soundproofing Underlayment - 6 mm inserted beneath can make a significant difference.
Best known for his work with such superstars as Beyoncé, Meek Mill, and Roddy Ricch, Khirye was put in touch with Audimute when he needed a sound-absorbing solution for his new home studio. After several phone calls and consultations, we created an acoustic treatment using AcoustiColor® acoustic panels in a geometric design, Fabric Acoustic Panels on the side walls of the space, and custom-made bass traps for the corners.
The outcome was an acoustically treated space that allows Khirye to use his studio the way it was intended to be used, with crisp, clear sound quality free of excessive echo and reverb.
Check out the video below for a look at Khirye Tyler's Audimute studio!