Finding Reflection Points in a Home Theater
- Mar 2, 2017
Are you ready to improve the acoustics of your home theater? We receive countless inquiries about home theater treatment each day, and the most commonly asked question is where acoustic panels should be applied to most effectively improve the sound quality in the theater. Today, I am going to take you step-by-step on finding reflection points and how you can use this as a guide for perfect panel placement.
First, we need to discuss what reflection points are. The primary reflection points are the points throughout your theater at which sound is initially reflecting. In other words, it’s the first surface that sound comes in contact with after leaving your speakers. Primary reflection points are important to find as these are the most effective treatment points throughout your home theater.

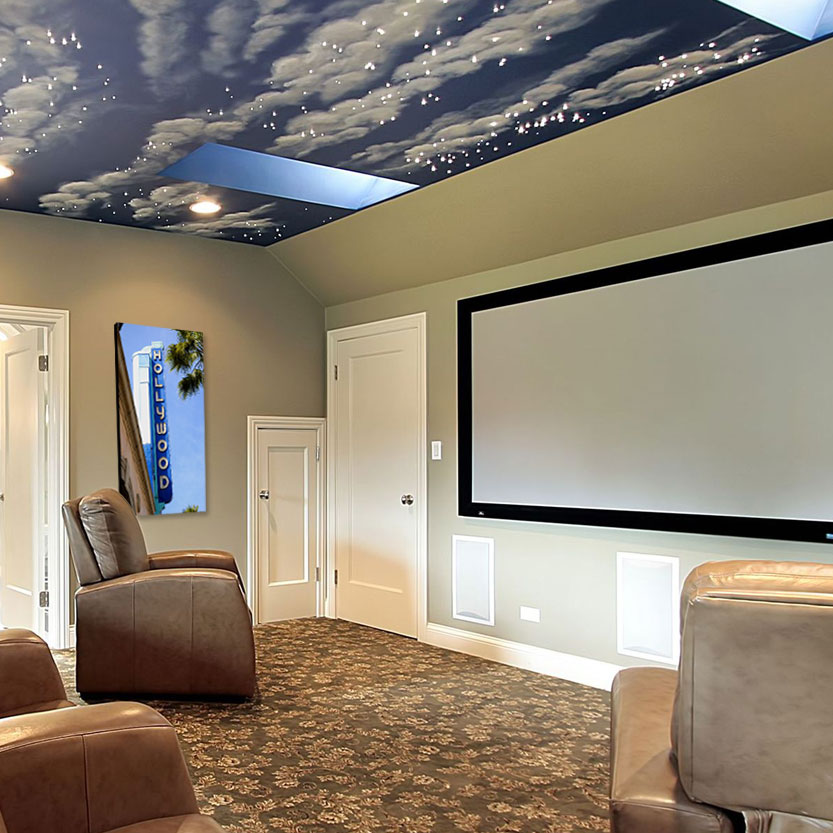
Now picture this: you just finished your home theater set up! You spent hours shopping for the right speakers, the most comfortable couch, and the best screen or projector. You throw in your favorite movie and notice something: you forgot to take the room acoustics into consideration! Fear not! That echo you’re noticing can be treated by adding acoustic panels to your theater!
To find the reflection points, you will need the following:
• A home theater
• A handheld mirror
• Sticky notes
• A patient friend
1. First, set up the room as if it were finished. Speakers and seating in your space should be placed in their final
 locations. Moving any of these elements will change the primary reflection points of sound throughout your space.
I recommend leaving the walls mostly bare (aside from any speakers). This will make the process of marking and finding reflection points much easier.
Once the walls are bare and the speakers are in their final position, it’s time to start listening. Carefully examine where the sound is coming from in the theater.
2. Second, have your friend hold the handheld mirror parallel to the wall surface. Face the screen in your theater, and move the mirror around the walls until you can see any speakers reflected in the mirror. Be sure not to move your head or tilt the mirror throughout this process, as this will alter the reflection points. Mark these points with a sticky note. These are the primary reflection points.
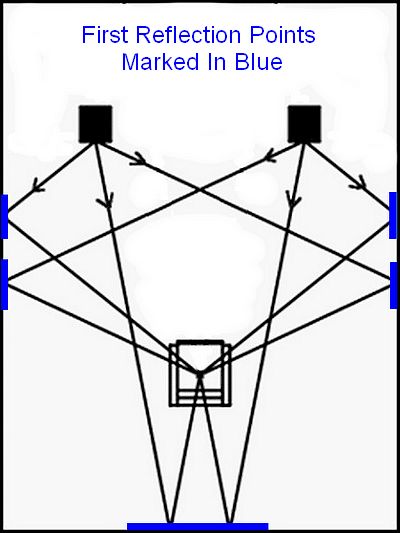
Each speaker in your space should have 6 reflection points (one on each of 4 walls, one on the ceiling, and one on the floor). For a 5-speaker system, there should be 30 reflection points. Some of these points may not be treatable. This would include points that are blocked by open hallways, furniture, or other objects. This is not an issue. While treating primary reflection points is important, treating every reflection point is not necessary to improve the sound quality in your theater.
3. Once you have the reflection points marked, you can begin adding absorption.
For reflection points on the floor, consider adding a rug. If the theater is carpeted, treating the floor should not be necessary. For any windows, consider adding curtains or drapes.
To treat any reflection points on the ceiling, consider flush-mounting Acoustic Tiles to the ceiling surface, or suspending Acoustic Clouds from the ceiling.
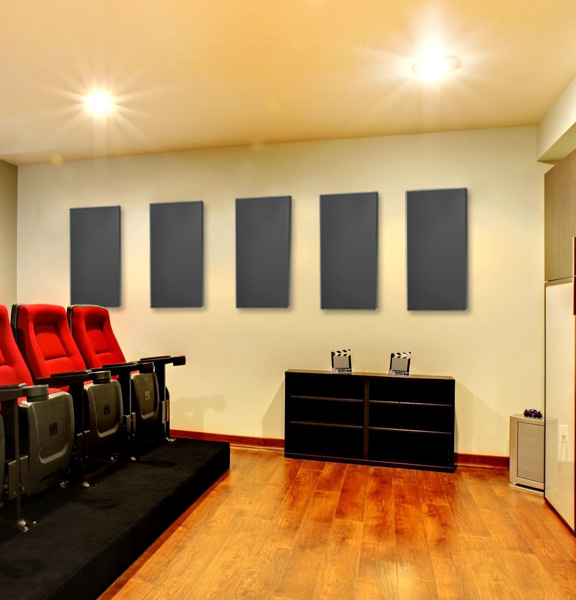
4. Finally, for the reflection points on the walls, consider adding Acoustic Panels. With a variety of sizes, colors, and styles to choose from, Audimute Acoustic Panels are an excellent option to consider for any home theater application.
For more advice on creating the perfect home theater, please don’t hesitate to contact one of our Acoustic Specialists!